37
$\begingroup$

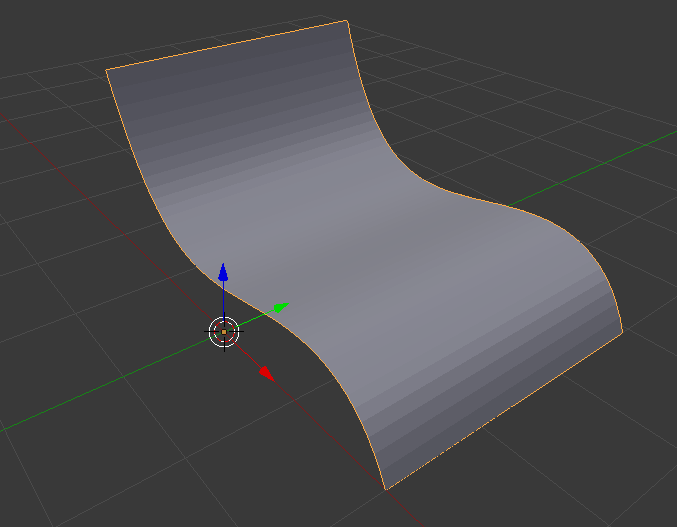
For a background, a lot of times I need a vertical wall, horizontal bottom, and a nice connecting curved surface between them in front of the camera. So far, I have used two methods:

  1. Deform a plane along the curve. This takes some time to get it right, as curve deformations are tricky, and it is almost impossible to make it truly horizontal or vertical.

  2. Create a cube, add bevel, apply, remove unnecessary parts of the mesh. Bevel tends to have artifacts around the corners of the cube for large bevel values and number of segments (e.g 25% of the cube side length, 64 segments).

What do you use? Am I missing some basic technique?

$\endgroup$

6 Answers 6

18
$\begingroup$

The fastest way I can think of is:

  • Add a mesh cube
  • Delete two vertices (so that you're left with a right angle)
  • ctrl1 to add a subsurf modifier
  • and then ctrlr to add an edge loop near the end of each face so that the ends are square (I can't post screenshots at the moment, sry).
  • done

Andrew Price does something similar near the middle of this tutorial (at time 31:19): http://www.youtube.com/watch?v=5Yd7ad08e54&feature=player_embedded#t=1879

His result is the same, but he starts with a plane instead of a cube.

As a bonus, if you're willing to learn a little Python and Blender coding, it's not hard to make an add-on that would add that object as a primitive in the Add->Mesh menu.

$\endgroup$
1
  • 2
    $\begingroup$ There is already an addon which will add a custom user made mesh as a primitive (I think it's called Creaprim) $\endgroup$
    – gandalf3
    Commented Dec 17, 2013 at 20:01
43
$\begingroup$

I usually do it like this, it's the quickest I've been able to find.

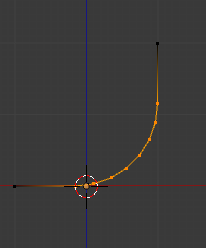
  1. Add a curve (I like to use paths because they are initialised as a straight line)
  2. Change its shape around a bit
  3. Convert it to a mesh Altc
  4. Extrude (in edit mode, e)
  5. Admire the beauty. Beautiful!
$\endgroup$
2
  • 3
    $\begingroup$ Awesome, thanks! For my particular purpose (vertical and horizontal planes connected) I like Matt's approach with subsurf a little better, but would use the above technique for a lot of other stuff. Would give you more votes if I could :) $\endgroup$
    – Alex Pakka
    Commented Dec 17, 2013 at 20:03
  • $\begingroup$ @AlexPakka You could extrude it multiple times as well. Of course, Matt's is neater :) $\endgroup$ Commented Dec 17, 2013 at 20:19
18
$\begingroup$

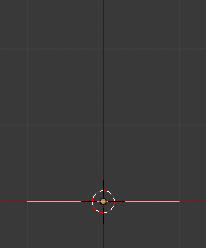
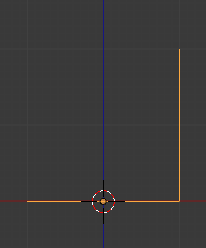
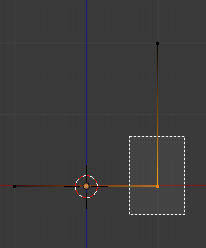
Another way is to use a plane and bevel it in edit mode. I can do the following steps in about 10 seconds (including the time to start and stop the timer).

  1. Add plane (⇧ ShiftA > Mesh > Plane):

    enter image description here

  2. Switch to edit mode (↹ Tab), select one edge (A > deselect all, B > border select), and extrude it upwards (E):

    enter image description here

  3. Select the corner edge again (A to deselect all, B for border select)

    enter image description here

  4. Bevel with CtrlB. Use the keyboard or the scrollwheel to set the number of segments:

    enter image description here

  5. Shade smooth.

Example (click the gif for a video version which can be slowed down):

Convenience:

If you find your self creating these objects for what seems like every other project, you could either:

  • Make a primitive out of it with the CreaPrim addon so it's available in the Add mesh menu. (See this answer for instructions)

or:

  • Include one in your startup.blend on a separate layer (this is what I did):

    1. Open a new file

    2. Create the "bent plane" object and optionally move it to another layer.

    3. Save the startup.blend (CtrlU). Note that this will save everything (view angle, materials, objects, user preferences, etc.) as it is as the way blender will start in the future.
      See this question for more information.

$\endgroup$
6
  • $\begingroup$ This is a good idea, but it is also #2 on the OP's list of known solutions. $\endgroup$
    – Matt
    Commented Dec 17, 2013 at 20:35
  • $\begingroup$ @Matt I think the OP was using the modifier, as they said "apply" $\endgroup$
    – gandalf3
    Commented Dec 17, 2013 at 20:36
  • $\begingroup$ I was under the impression that ctrl-B added a Bevel modifier. Does it not? $\endgroup$
    – Matt
    Commented Dec 17, 2013 at 20:39
  • 1
    $\begingroup$ @Matt No, it bevels the selected edges (I'll put up some images in a second) $\endgroup$
    – gandalf3
    Commented Dec 17, 2013 at 20:40
  • 1
    $\begingroup$ @mins The screencast is intentionally fast, to demonstrate that it can be done quickly. Unfortunately the poor framerate leaves out a lot of information. I've added all the key presses in the text and uploaded a better screencast which can be sped up/slowed down. $\endgroup$
    – gandalf3
    Commented Jul 19, 2015 at 0:36
9
$\begingroup$

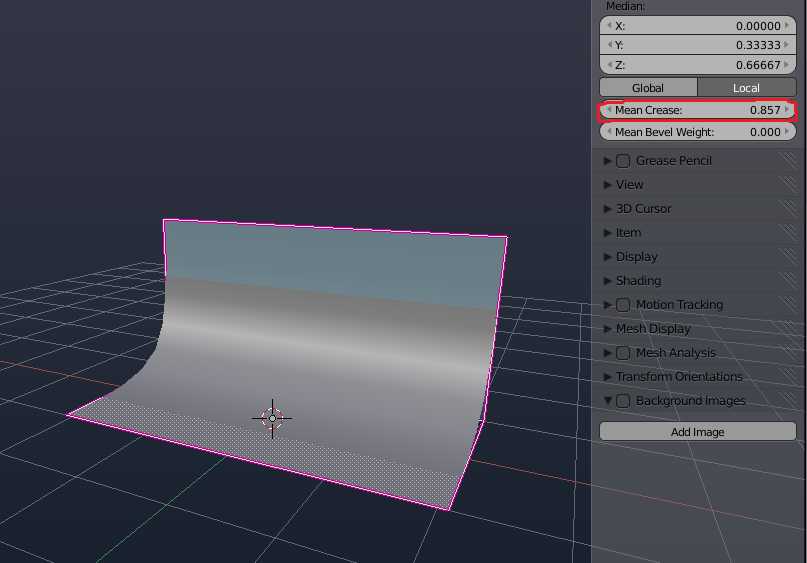
The absolute fastest way to do this is to just add a plane, extrude one side and crease all the edges (ShiftE) except the one where the planes join (you can also select the edges and increase the Mean Crease in the properties panel). Next add a subsurf modifier and shade it smooth, much less polys than the other solutions and an equally nice result.

enter image description here

$\endgroup$
1
  • $\begingroup$ That is really a fast method with acceptable results! $\endgroup$
    – hochl
    Commented May 27, 2019 at 11:10
3
$\begingroup$

Add a cylinder and remove its circular faces. Next cut out one-fourth of this cylinder and let everything else go. Scale it according to size needed and it gives an L-shaped curved backdrop. Also add subsurf and smooth shading to get that curved look

$\endgroup$
1
$\begingroup$

Add a cylinder with a radius of the desired curve.

Delete 3 quarters of the cylinder, leaving a curve over 90 degrees.

Extrude the lower edge horizontally and the upper edge vertically.

$\endgroup$

You must log in to answer this question.

Not the answer you're looking for? Browse other questions tagged .