-
Pros
- Includes color, black-and-white, HDR, and sharpening tools
- Silver Efex is fantastic
- Streamlined interface across multiple applications
- Integrates with Adobe and Capture One workflows
- Supports the latest operating systems and displays
- Native compatibility with Apple Silicon
-
Cons
- Underwhelming nondestructive workflow support
- Film looks are available in competing software
The Nik Collection has changed ownership several times since its launch in the '90s, but its black-and-white and color film looks remain legendary. The latest version of the photo editing suite, Nik Collection 6 by DxO ($149 for new customers, $79 as an upgrade), adds a handy new Control Line function to U Points, brings the codebase up to date with support for Apple Silicon, and introduces some new features to the Color and Perspective Efex apps. Sharpener and HDR Efex are also set to get interface updates this summer. These upgrades might not be as compelling as in years past, but HDR specialists and photographers with a modern Mac might still want to get the latest version. For new users (and especially fans of film-inspired looks), the Collection continues to provide a wealth of top-notch editing tools.
What's in Nik Collection 6?
If you're used to workflow applications such as Lightroom Classic and Capture One Pro, you might be a little surprised by how you access the tools within the Nik Collection. It's not one big piece of software, but rather a suite of distinct plug-ins that integrate with a host workflow application (such as Lightroom, Photoshop, or Capture One). Earlier editions of the Nik Collection included DxO PhotoLab, but that's not the case with Collection 6.

The eight Nik apps—Analog Efex Pro, Color Efex Pro, Dfine, HDR Efex Pro, Perspective Efex, Silver Efex Pro, Sharpener Pro, and Viveza—provide editing tools that aren't available in Raw workflow suites. Each application targets a specific purpose, and I break them down one by one below. The suite offers a mix of artistic filter effects and tools to accomplish more technical tasks, such as noise reduction and sharpening.
I'm happy to report that DxO has upgraded the codebase for the Nik Collection with this year's update. Although the software has long supported 64-bit performance on macOS and Windows, version 6 upgrades all of the apps to Universal for Mac, which means they run on both Apple Silicon and Intel chips without compromise.
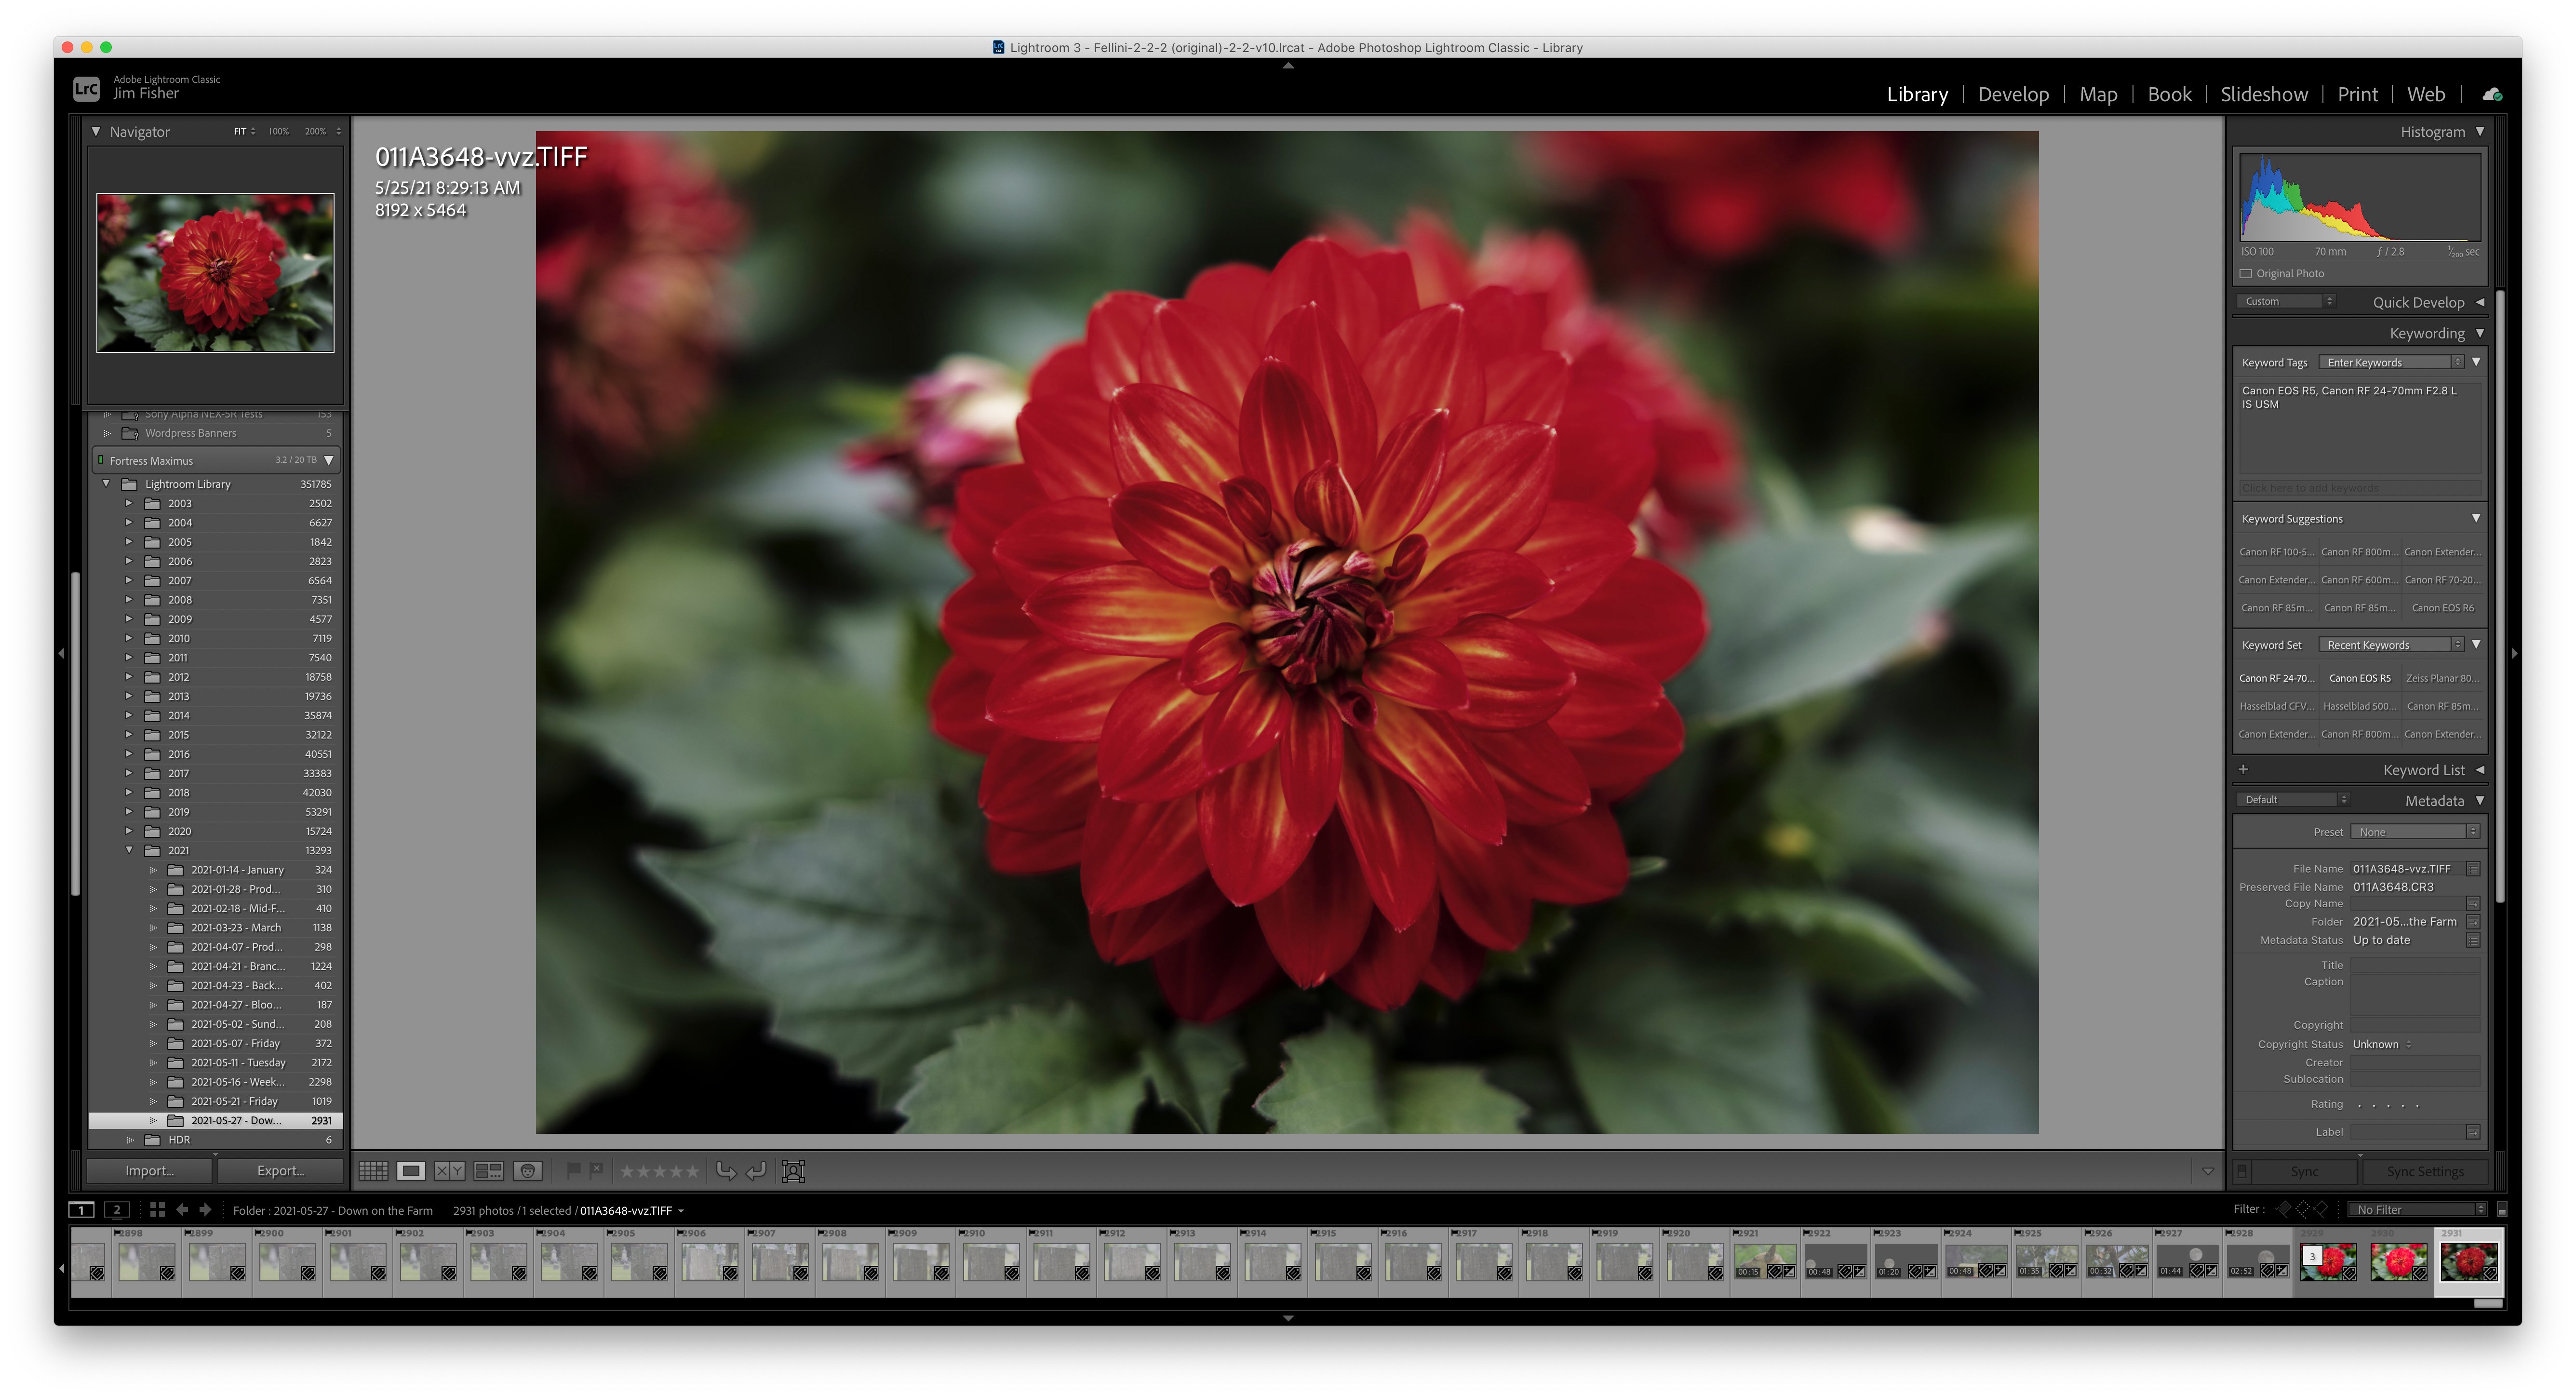
You can find the full system requirements here. They aren't strenuous and, if you have a workstation that's capable of processing digital image files, you should be set. A trial download is available too, in case you're concerned your system isn't powerful enough or you just want to test the software.
Not Quite Nondestructive
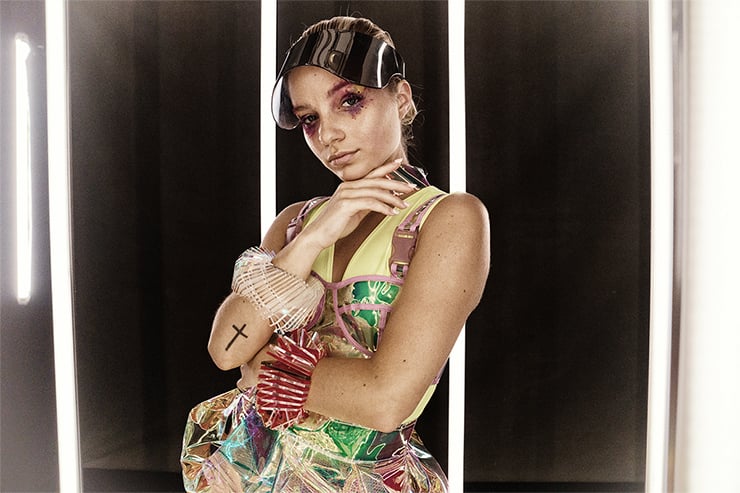
Version 4 introduced several improvements to help photographers work on the same image across multiple apps, including tighter integration with Adobe and a speedier batch workflow process to apply the same edits to multiple images that doesn't require you to leave the confines of Lightroom or Photoshop. You can also copy adjustments from multiple apps, but you must remember to apply them in the same order as with the original image—results won't look the same otherwise.
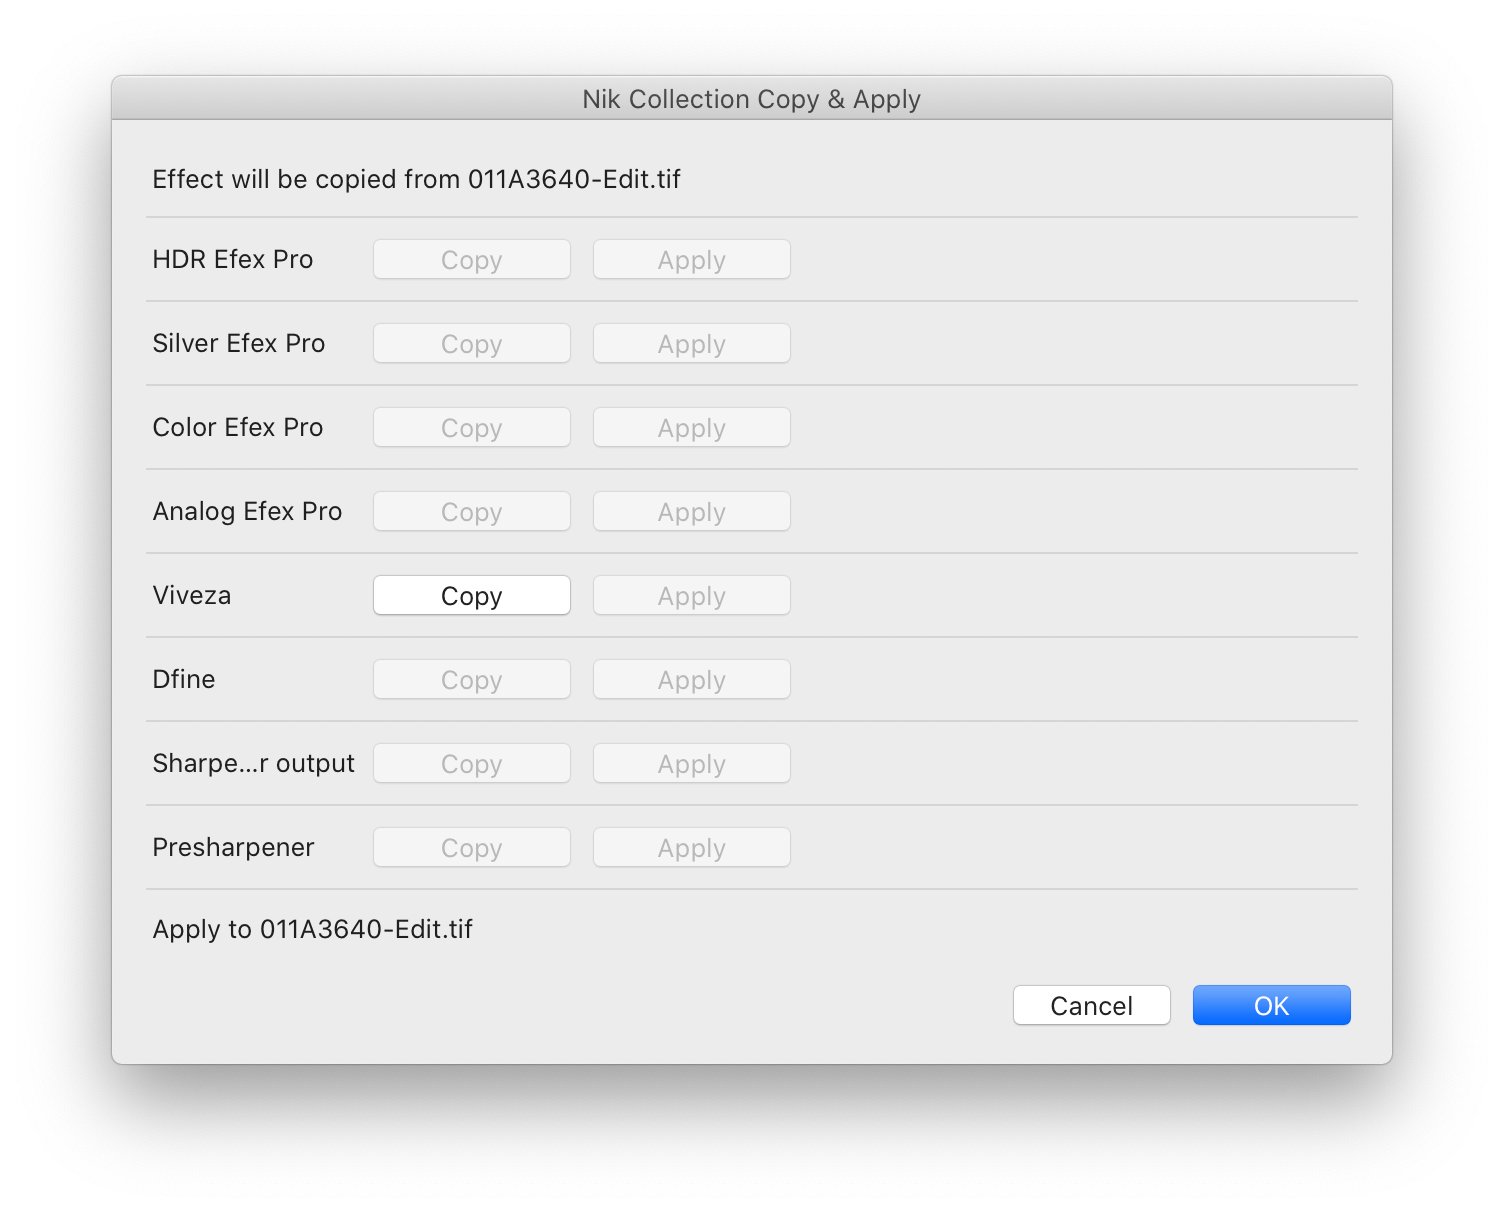
Images contain information about which filters are active, so you don't need to track and manage sidecar files. If you use Photoshop as a launcher, you can also turn your edits into Smart Objects, though you need to save photos in PSD format for this to work.
Saving non-destructive edits requires you to make duplicate files, however; if you use a high-resolution camera, be prepared to get a big hard drive to store everything. The TIFF format files you use for editing are a lot larger than the Raw images your camera captures, even if you opt for an uncompressed format.
For instance, a 60MP Raw image from the Sony a7R IV is about 60MB; the same file as a TIFF is about 360MB (or 720MB if you enable nondestructive edits). There's a benefit here—the bigger file stores your original image, too. It makes it possible to work on a single image across multiple editing sessions and unlocks a bit more creative freedom.

There's a limitation, though. The edits don't carry over from one application to another. As an example, I applied a Vintage Camera look to the photo above in Analog Efex. With the nondestructive edits turned on, I was able to go back and make changes after the fact with ease. But once I loaded the same file into Color Efex Pro and added a Bleach Bypass effect, I lost the ability to undo the edits I made in Analog Efex. So, the edits are technically nondestructive, but only as it pertains to the most recent application you used.

Better U Points in the Creative Apps
DxO has made some changes to the way U Point controls work. A hallmark of the Nik Collection, U Points make selective adjustments to color, exposure, contrast, and other settings possible. These localized adjustments are useful for when you want to restrict edits to just one area of your image.
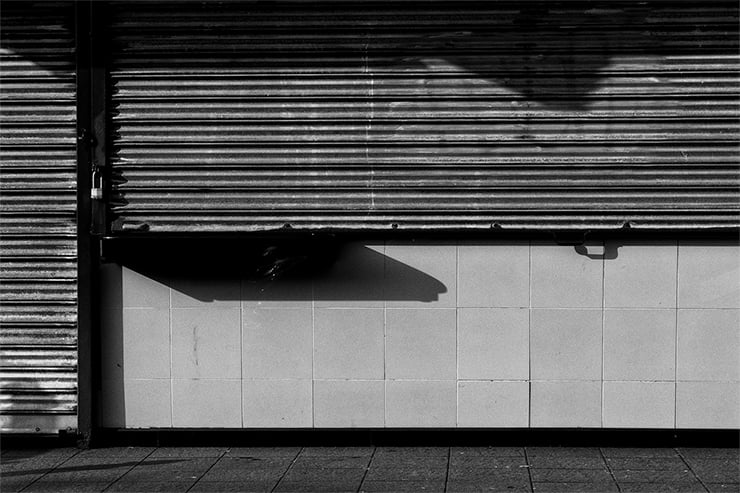
The updated U Point system is easier to manage. For example, you can now rename U Points; create more accurate masks based on the luminance or color value; apply and adjust a diffusion effect; or even save them as part of a preset. These functions are available in all of the apps except HDR Efex Pro and Sharpener Pro at launch time. DxO promised to update the two stragglers this summer.
Nik Collection 6 expands U Points beyond single-point spot adjustments: You can now add a Control Line instead of a point for a graduated filter effect. U Point Control Lines can further be any width apart and at any angle. It's a versatile tool that takes the Nik Collection's abilities beyond spot edits. To try it out, I loaded a landscape photo in Color Efex and chose the Foliage Pop preset to bring out the green in the background. I didn't like the increased green saturation in the foreground, however, so I added a Control Line to restrict the area to the top third of the frame. With that change, I got the foliage to pop without changing the tone of the rest of the photo.
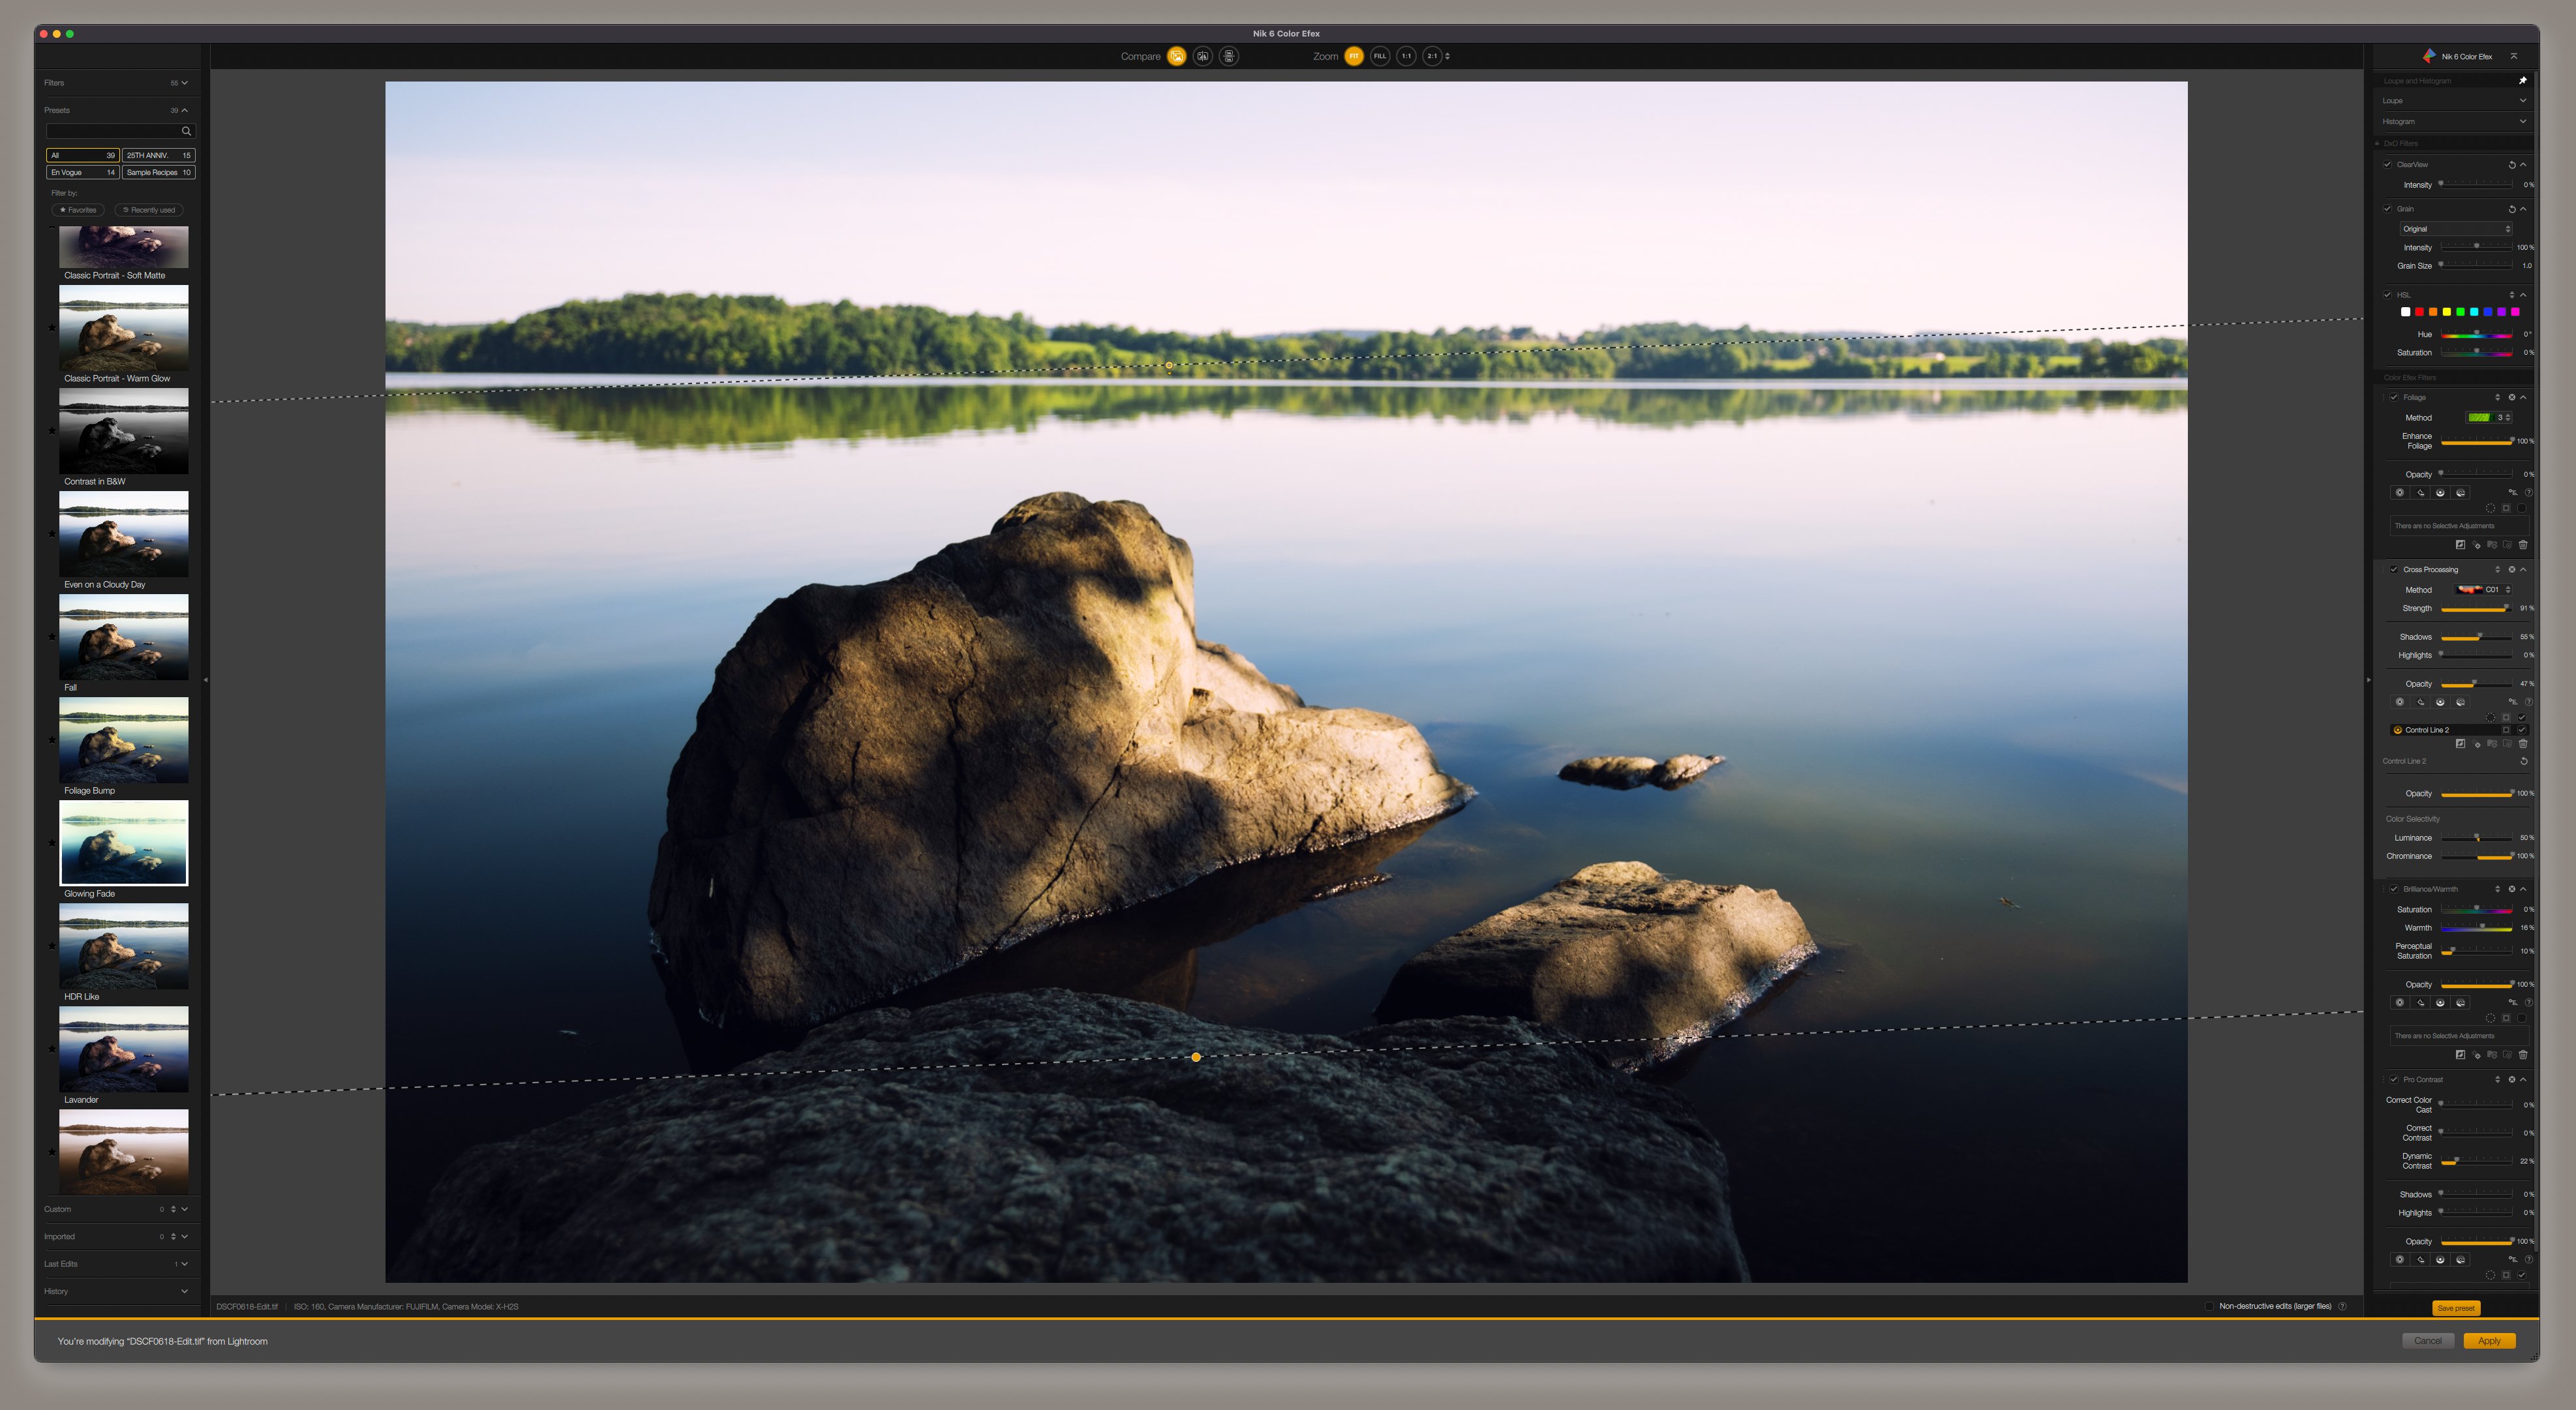
I discuss each app in more detail below. Each has its strengths: Analog Efex is for unique toy camera, motion, and similar creative filters; Color Efex offers color and black-and-white filter looks; Silver Efex mimics the style of many classic film emulsions, including Kodak Tri-X and Ilford Delta; HDR Efex helps you tone map images to get more shadow and highlight detail than you can from a single exposure; Dfine and Sharpener Pro include pre-print tools to enhance clarity; and Perspective Efex offers technical adjustments for correcting geometry as well as creating the artistic miniature effect.
One other note: I discuss how the software works in conjunction with Adobe Lightroom Classic here but, mechanics aside, the experience should be similar with Photo Lab or Capture One.
Analog Efex Pro 3
Analog Efex Pro enjoyed a major update in Nik Collection 5, but aside from Apple Silicon code and U Point Control Lines, is unchanged for version 6. The toolkit is similar; the app is a virtual Swiss Army knife of film and motion effects that you can use to build presets, or Cameras, in the app. Looks skew toward those that emulate vintage photo equipment (with special attention to the dusty, scratchy look you can get from Wet Plate negatives); the imperfections of toy cameras; and motion blur.
The fresh interface now matches that of Silver Efex and Viveza, so there's a little more consistency from app to app. Nik hasn't added any new filters or effects to Analog Efex 3, but it did improve preset management. You can now make custom presets, for example, and thus more easily recreate a vintage look across a series of images. Presets are also sortable in this version.
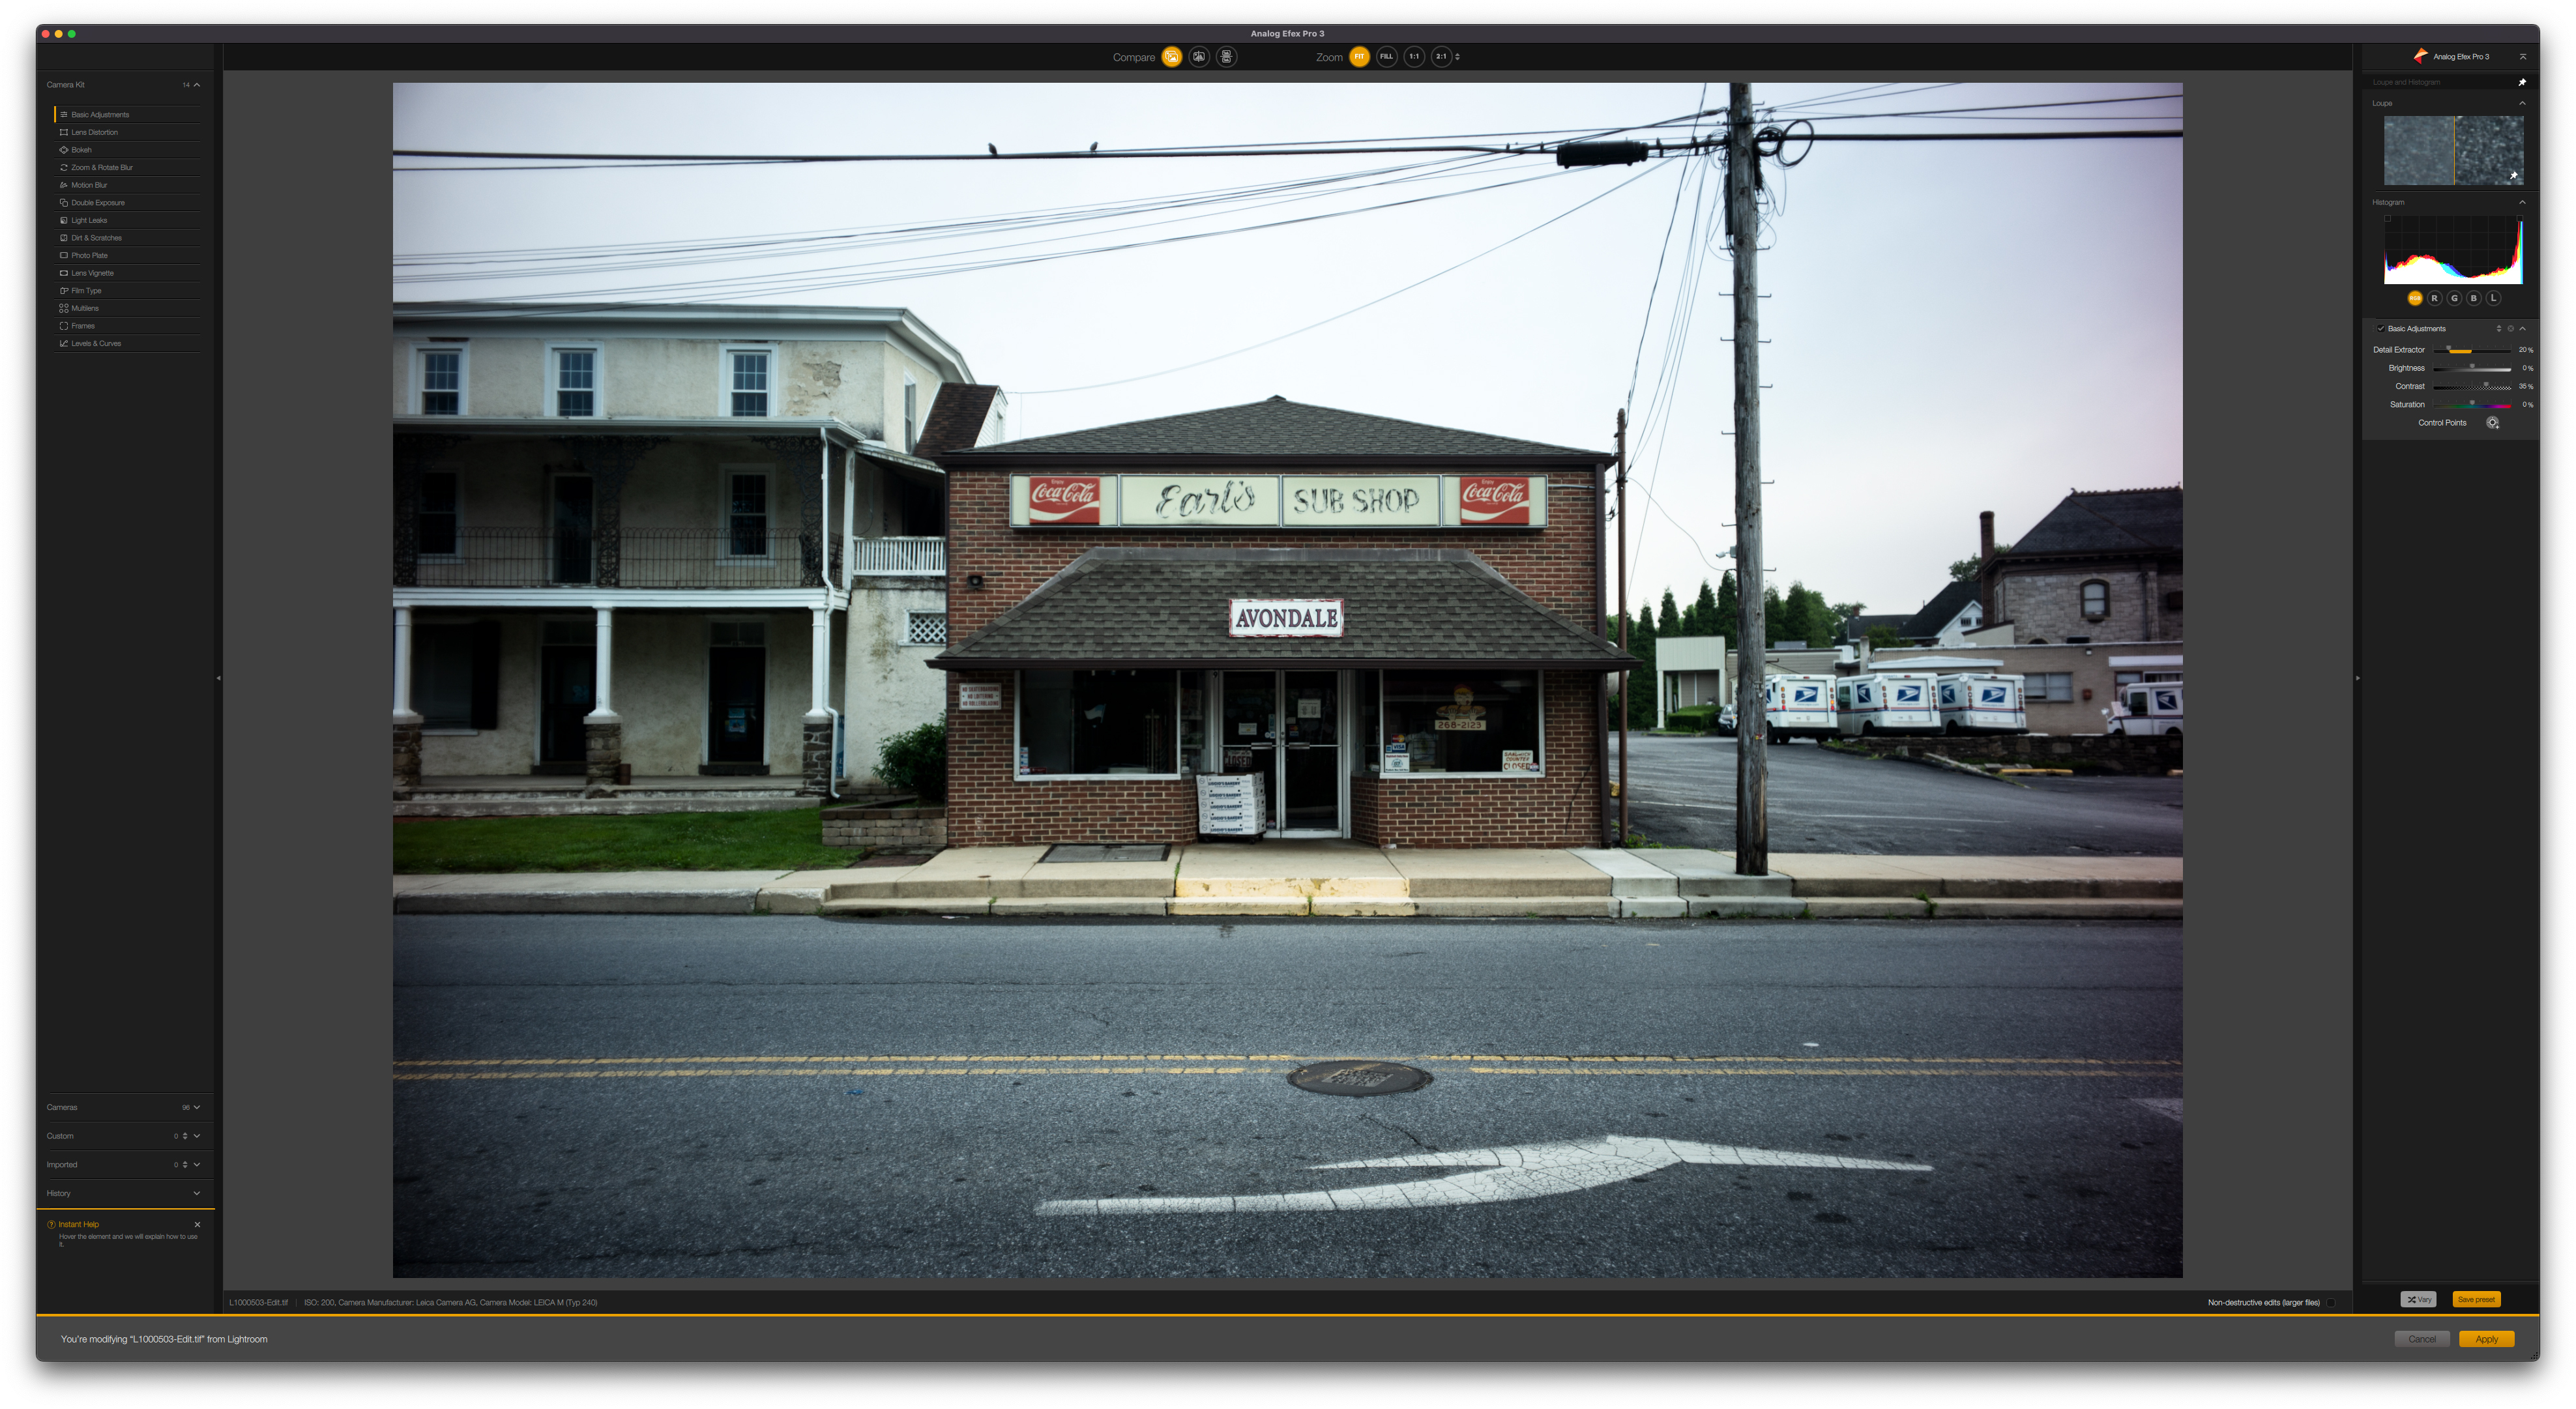
To try out some of the Analog Efex looks, I started with the unedited image in the screenshot above. It's a photo I made with a vintage lens, the first edition of the Leica Elmarit-M 28mm F2.8 from the early 1960s, and an M Typ 240 digital rangefinder.
The image already has a bit of a vintage look because of the old glass, but Analog Efex can push that aesthetic further. I browsed through the filter options, working to craft a look. You can roll custom presets by making Basic Adjustments to color or contrast; adding Lens Distortion; creating a Bokeh effect; adding Light Leaks; or choosing other filter effects. They appear in a list in the left panel; once you add a filter, you can adjust its parameters via the panel to the right of your photo.

It's easy enough to add filters and craft a look for an image if you have an idea in mind. If you're struggling to find a starting point, however, presets are useful. Analog Efex puts them in a section called Cameras; it includes 96 presets out of the box and you can craft custom ones, too.
I went with the Vintage Camera 7 option to give my photo the look of an old camera and film: It added grain and a photo-print style white border. After you apply a preset, you can adjust the strength of various parameters; toggle them on or off; or click the "Vary" button to randomize a few values for a slightly different look.

It's not all grain and faded film looks though. Analog Efex also has some interesting motion blur options that offer drag-and-drop control over the locus and direction of the blur via the U Point system. I used the Motion 7 preset to add some blur around the horse and rider jumping over an obstacle in the image above—without edits, this action shot doesn't do a great job of conveying movement.
Analog Efex Pro 3 also has multi-lens filters for Andy Warhol-style split images; simulated light leaks and lens distortion; film strip frames; double exposure options; and basic tone, curve, and level adjustments. Its creative toolkit offers a wealth of options for photographers who want to give photos a distinctly vintage or filtered look.
Color Efex Pro 5
If you're a fan of filters, Color Efex Pro should make you happy. It offers a laundry list of options, ranging from the emulation of some color film types (similar to what Silver Efex does for black-and-white stocks) and processes—think cross-processing and bleach bypass—to more extreme filters that blur the lines between photography and fine art, such as solarization.
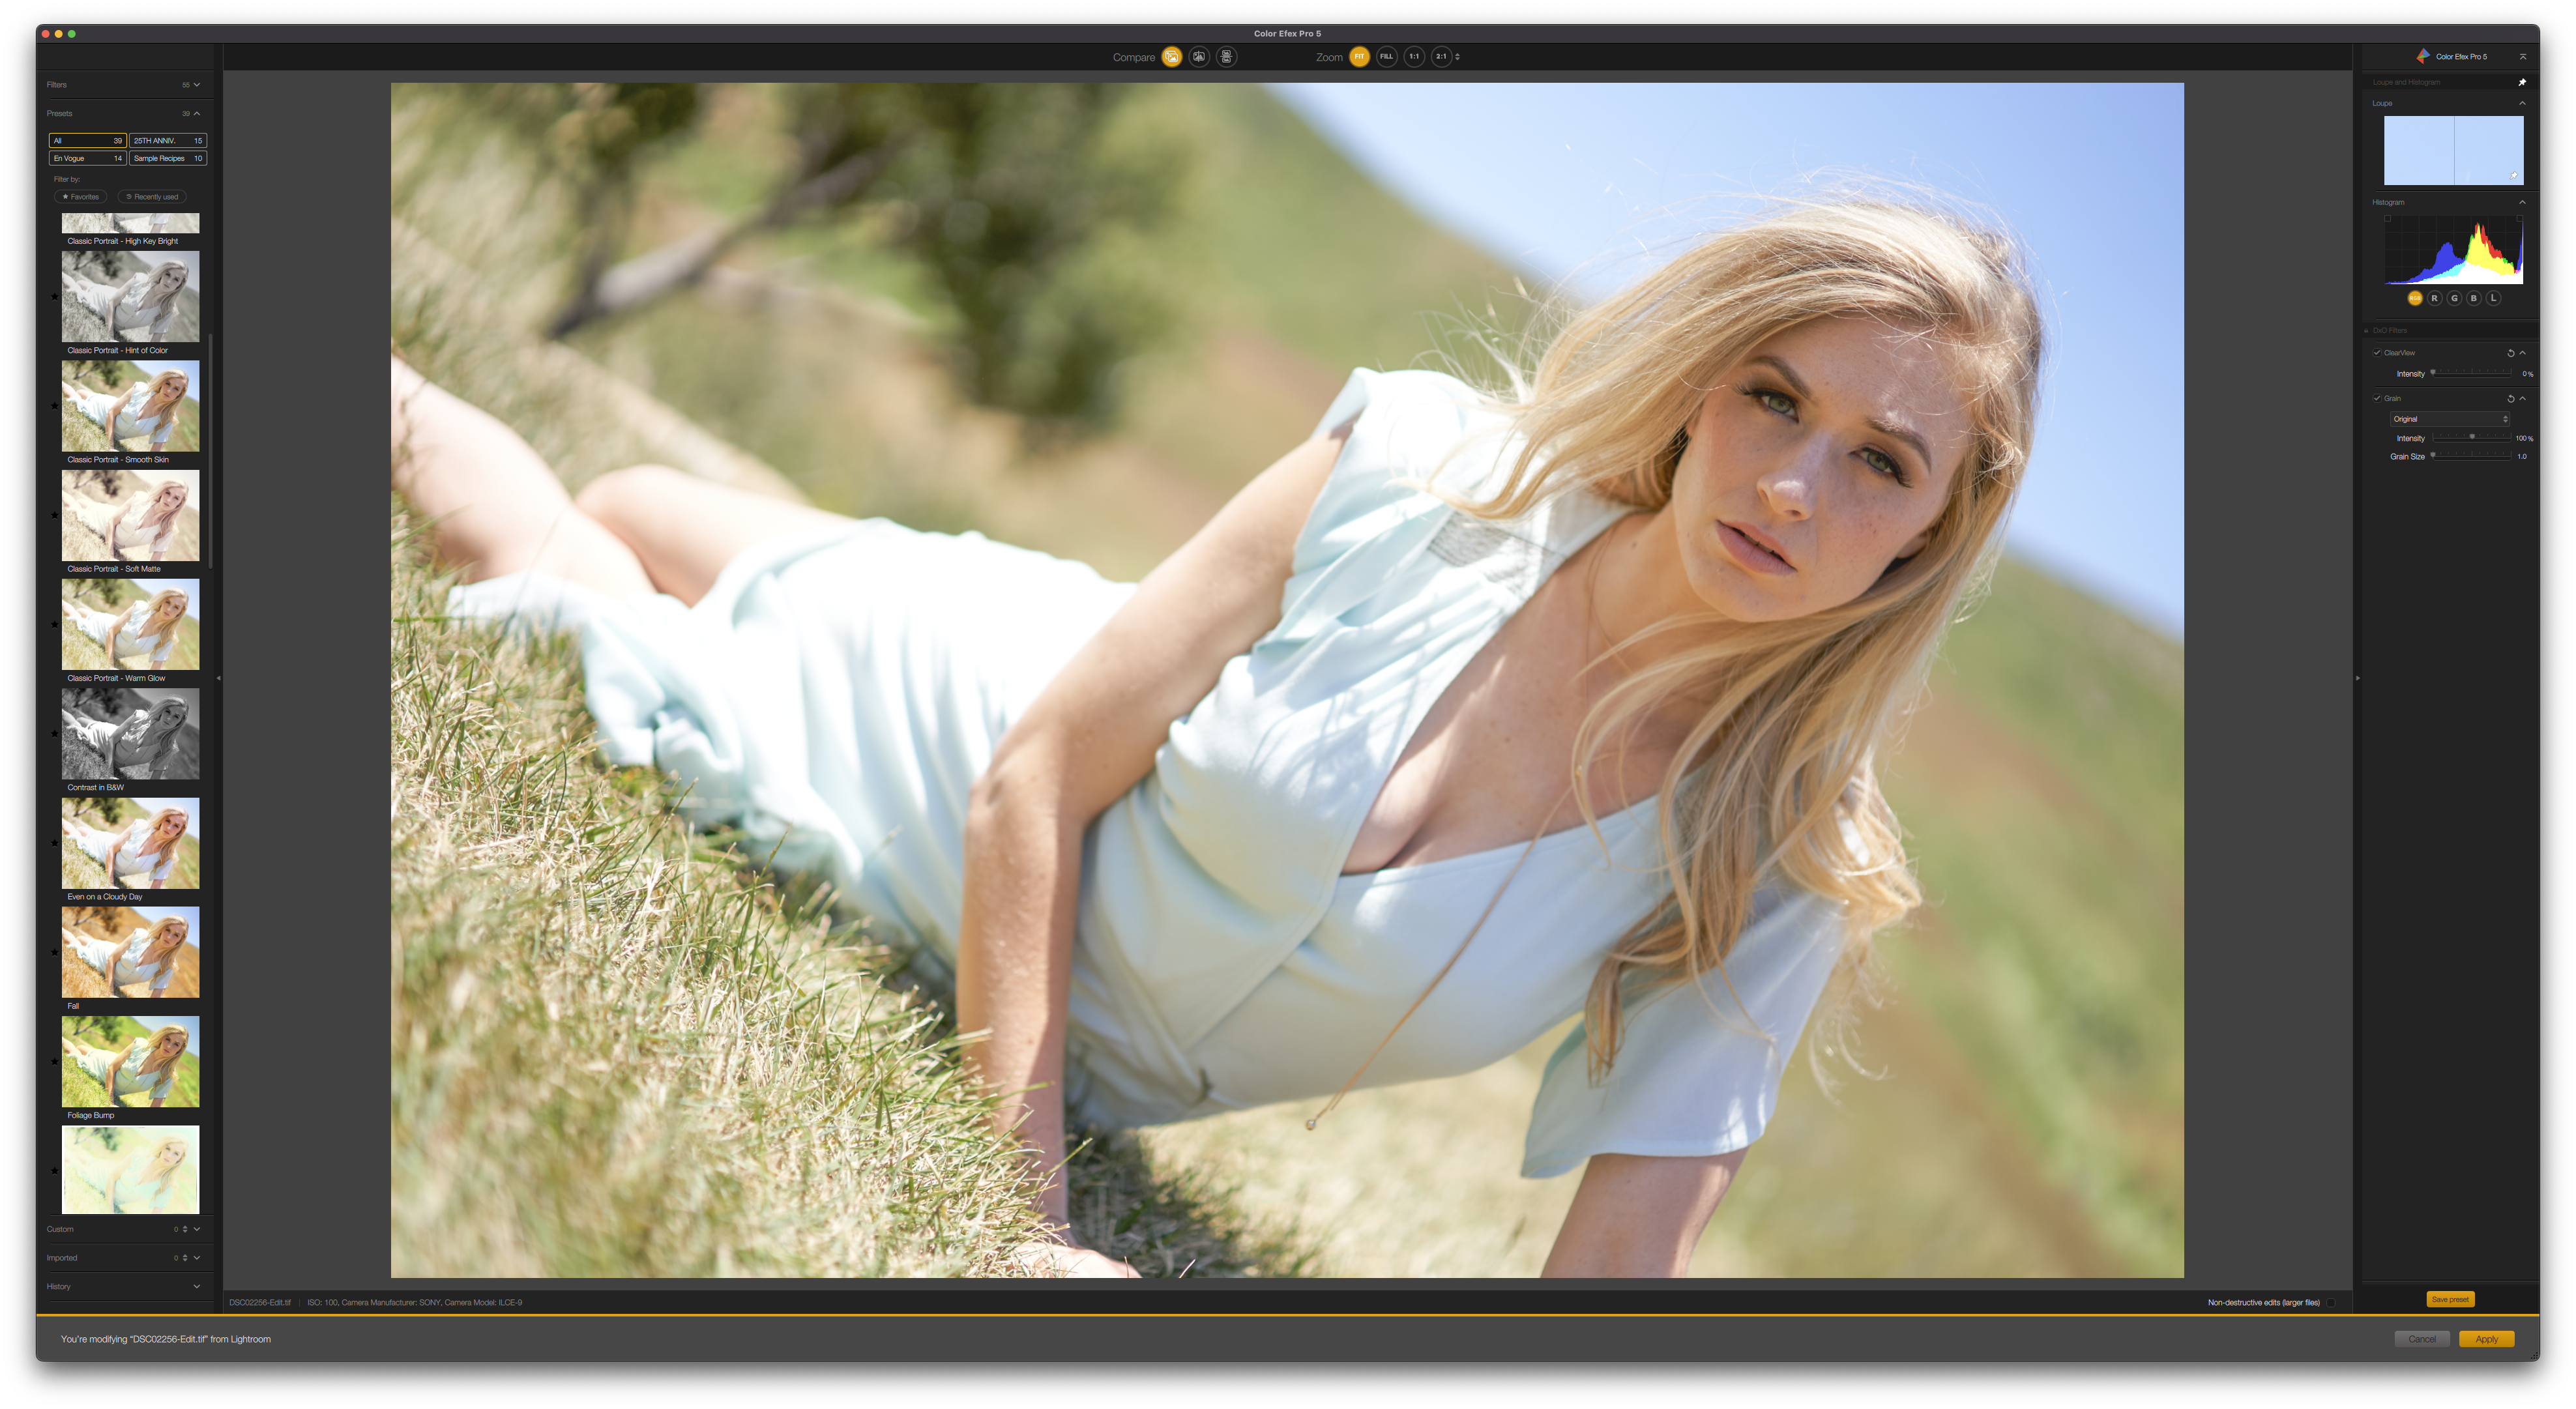
Last year's update brought the Color Efex Pro interface up to date with the other creative apps in the suite. The control panels look more modern and the enhanced U Point controls now match those in Analog Efex, Silver Efex, and Viveza. It also adds a ClearView filter to remove haze from photos, as well as a whopping 29 unique grain patterns, all based on film emulsions.
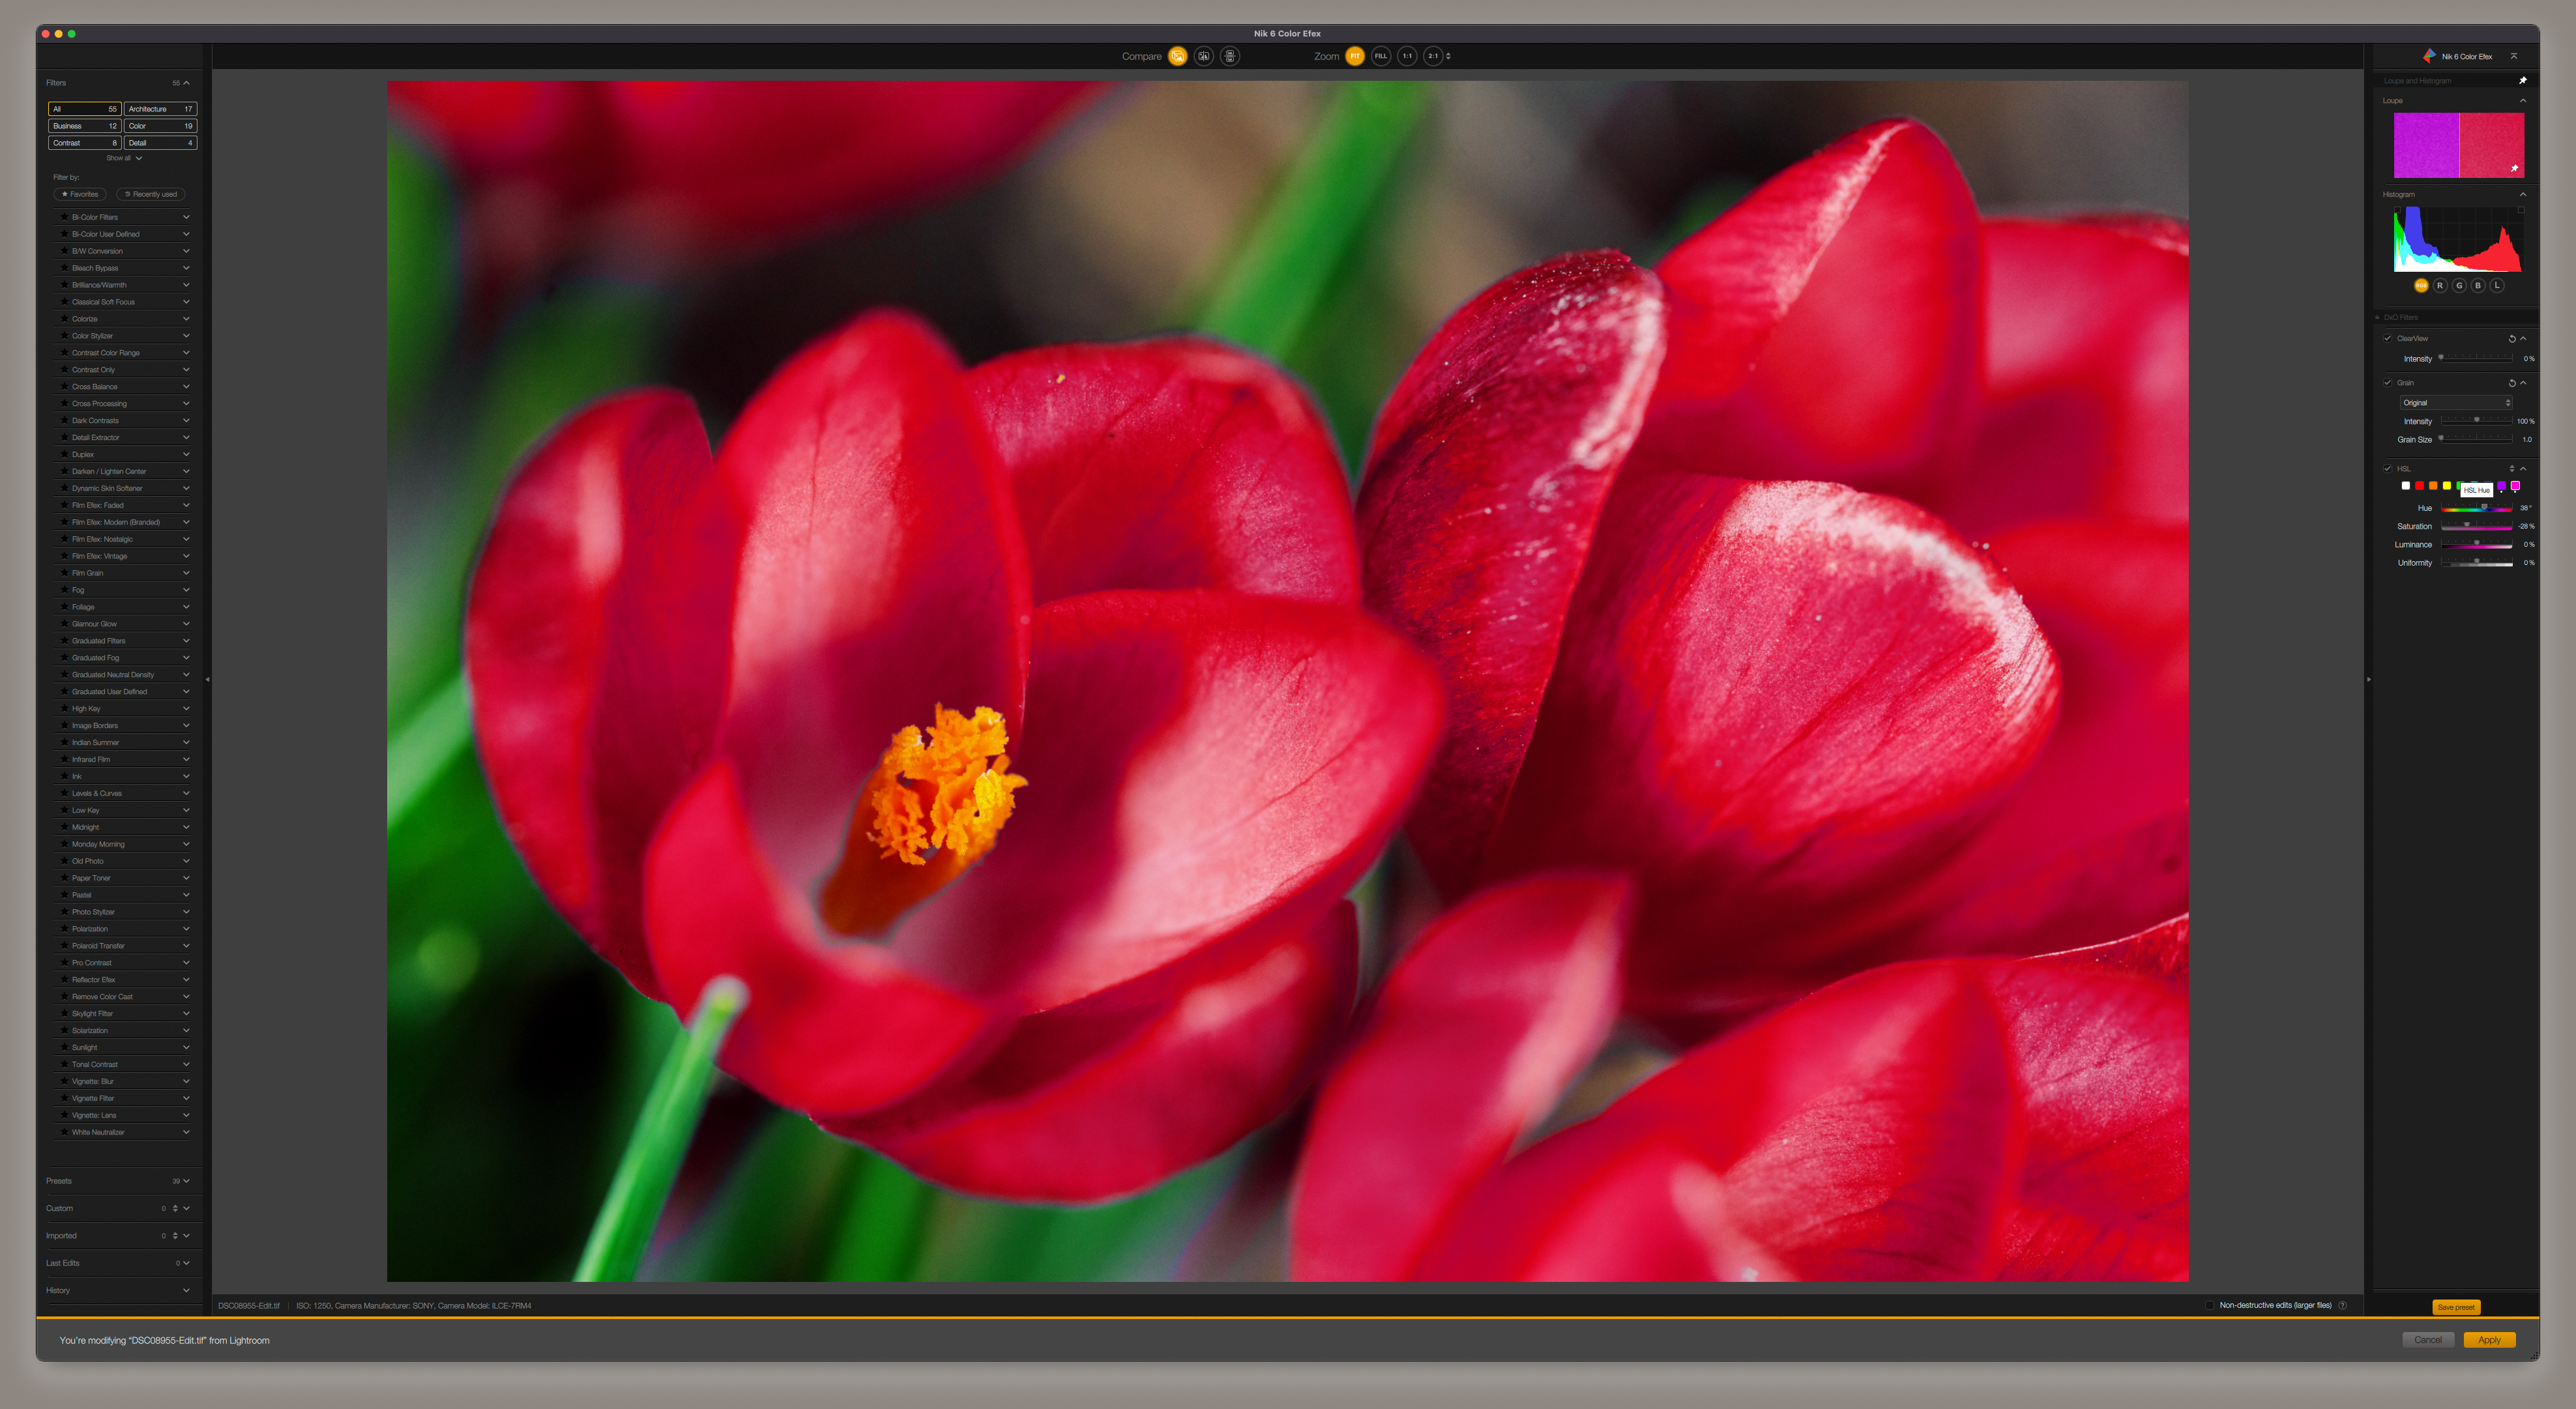
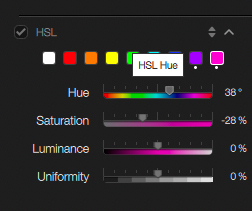
For collection 6, Nik updates the code for Apple Silicon and introduces U Point Control Lines. The only other change of note is a new global Highlight/Saturation/Luminance (HSL) slider tool. The eight-channel mixer makes it easy to manipulate color in a photo. I took a photo of deep purple flowers and turned the petals red by shifting the blue, purple, and indigo channels toward red. You can also use this tool for selective color effects. It's just as simple to desaturate all but a single color, a technique made famous by the "red dress girl" in Spielberg's otherwise monochrome masterpiece, Schindler's List.
The filter list is extensive (there are 55 in total) and the software allows you to stack as many onto one image as you want. It's easy to toggle the effects of any with a simple checkbox, so you can play with combinations and save custom presets. Nik also includes 39 presets in the app if you're looking for some inspiration.
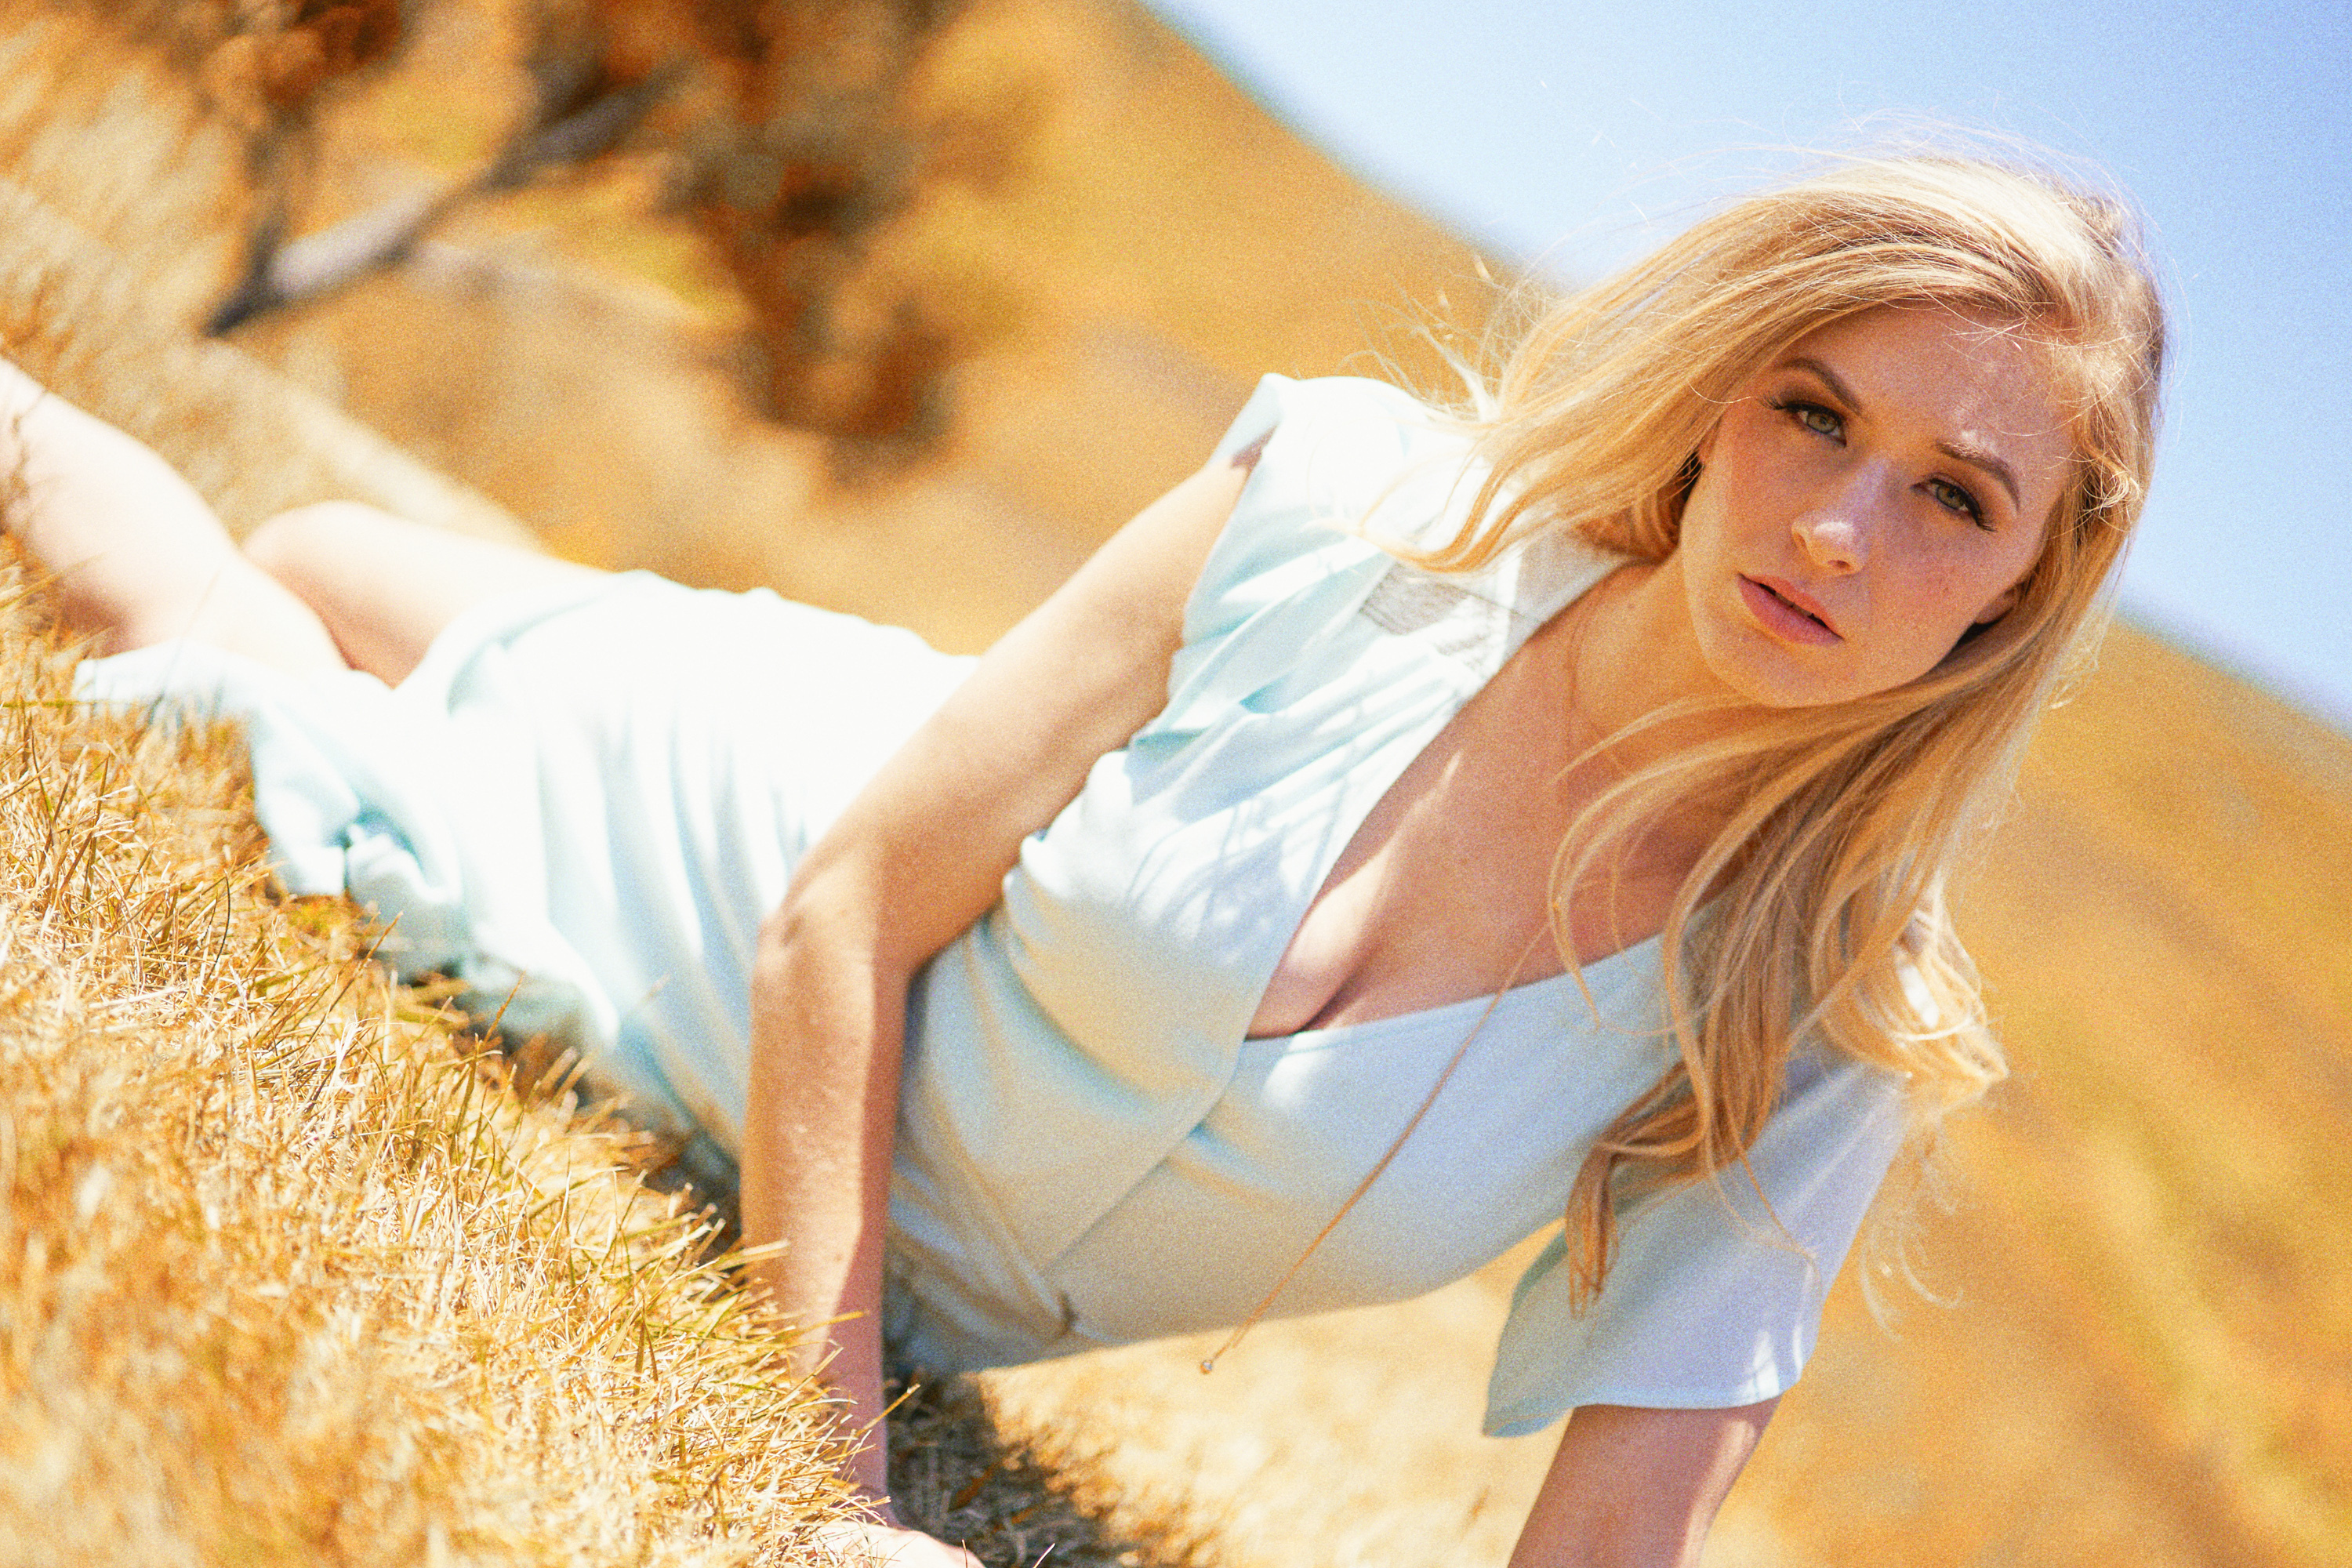
For the image above, I started with the Fall preset; it shifts the green color of the grass to a sunburnt orange—not realistic, but a better match for the mood of the frame. For texture, I applied a Fujifilm Superia 1600 grain and pumped the intensity so the effect would show clearly on the web. Superia 1600 was my favorite high-speed color film, but it's no longer in production; all and all, the simulated grain matches up with what I remember from running rolls of Superia through an old Pentax.
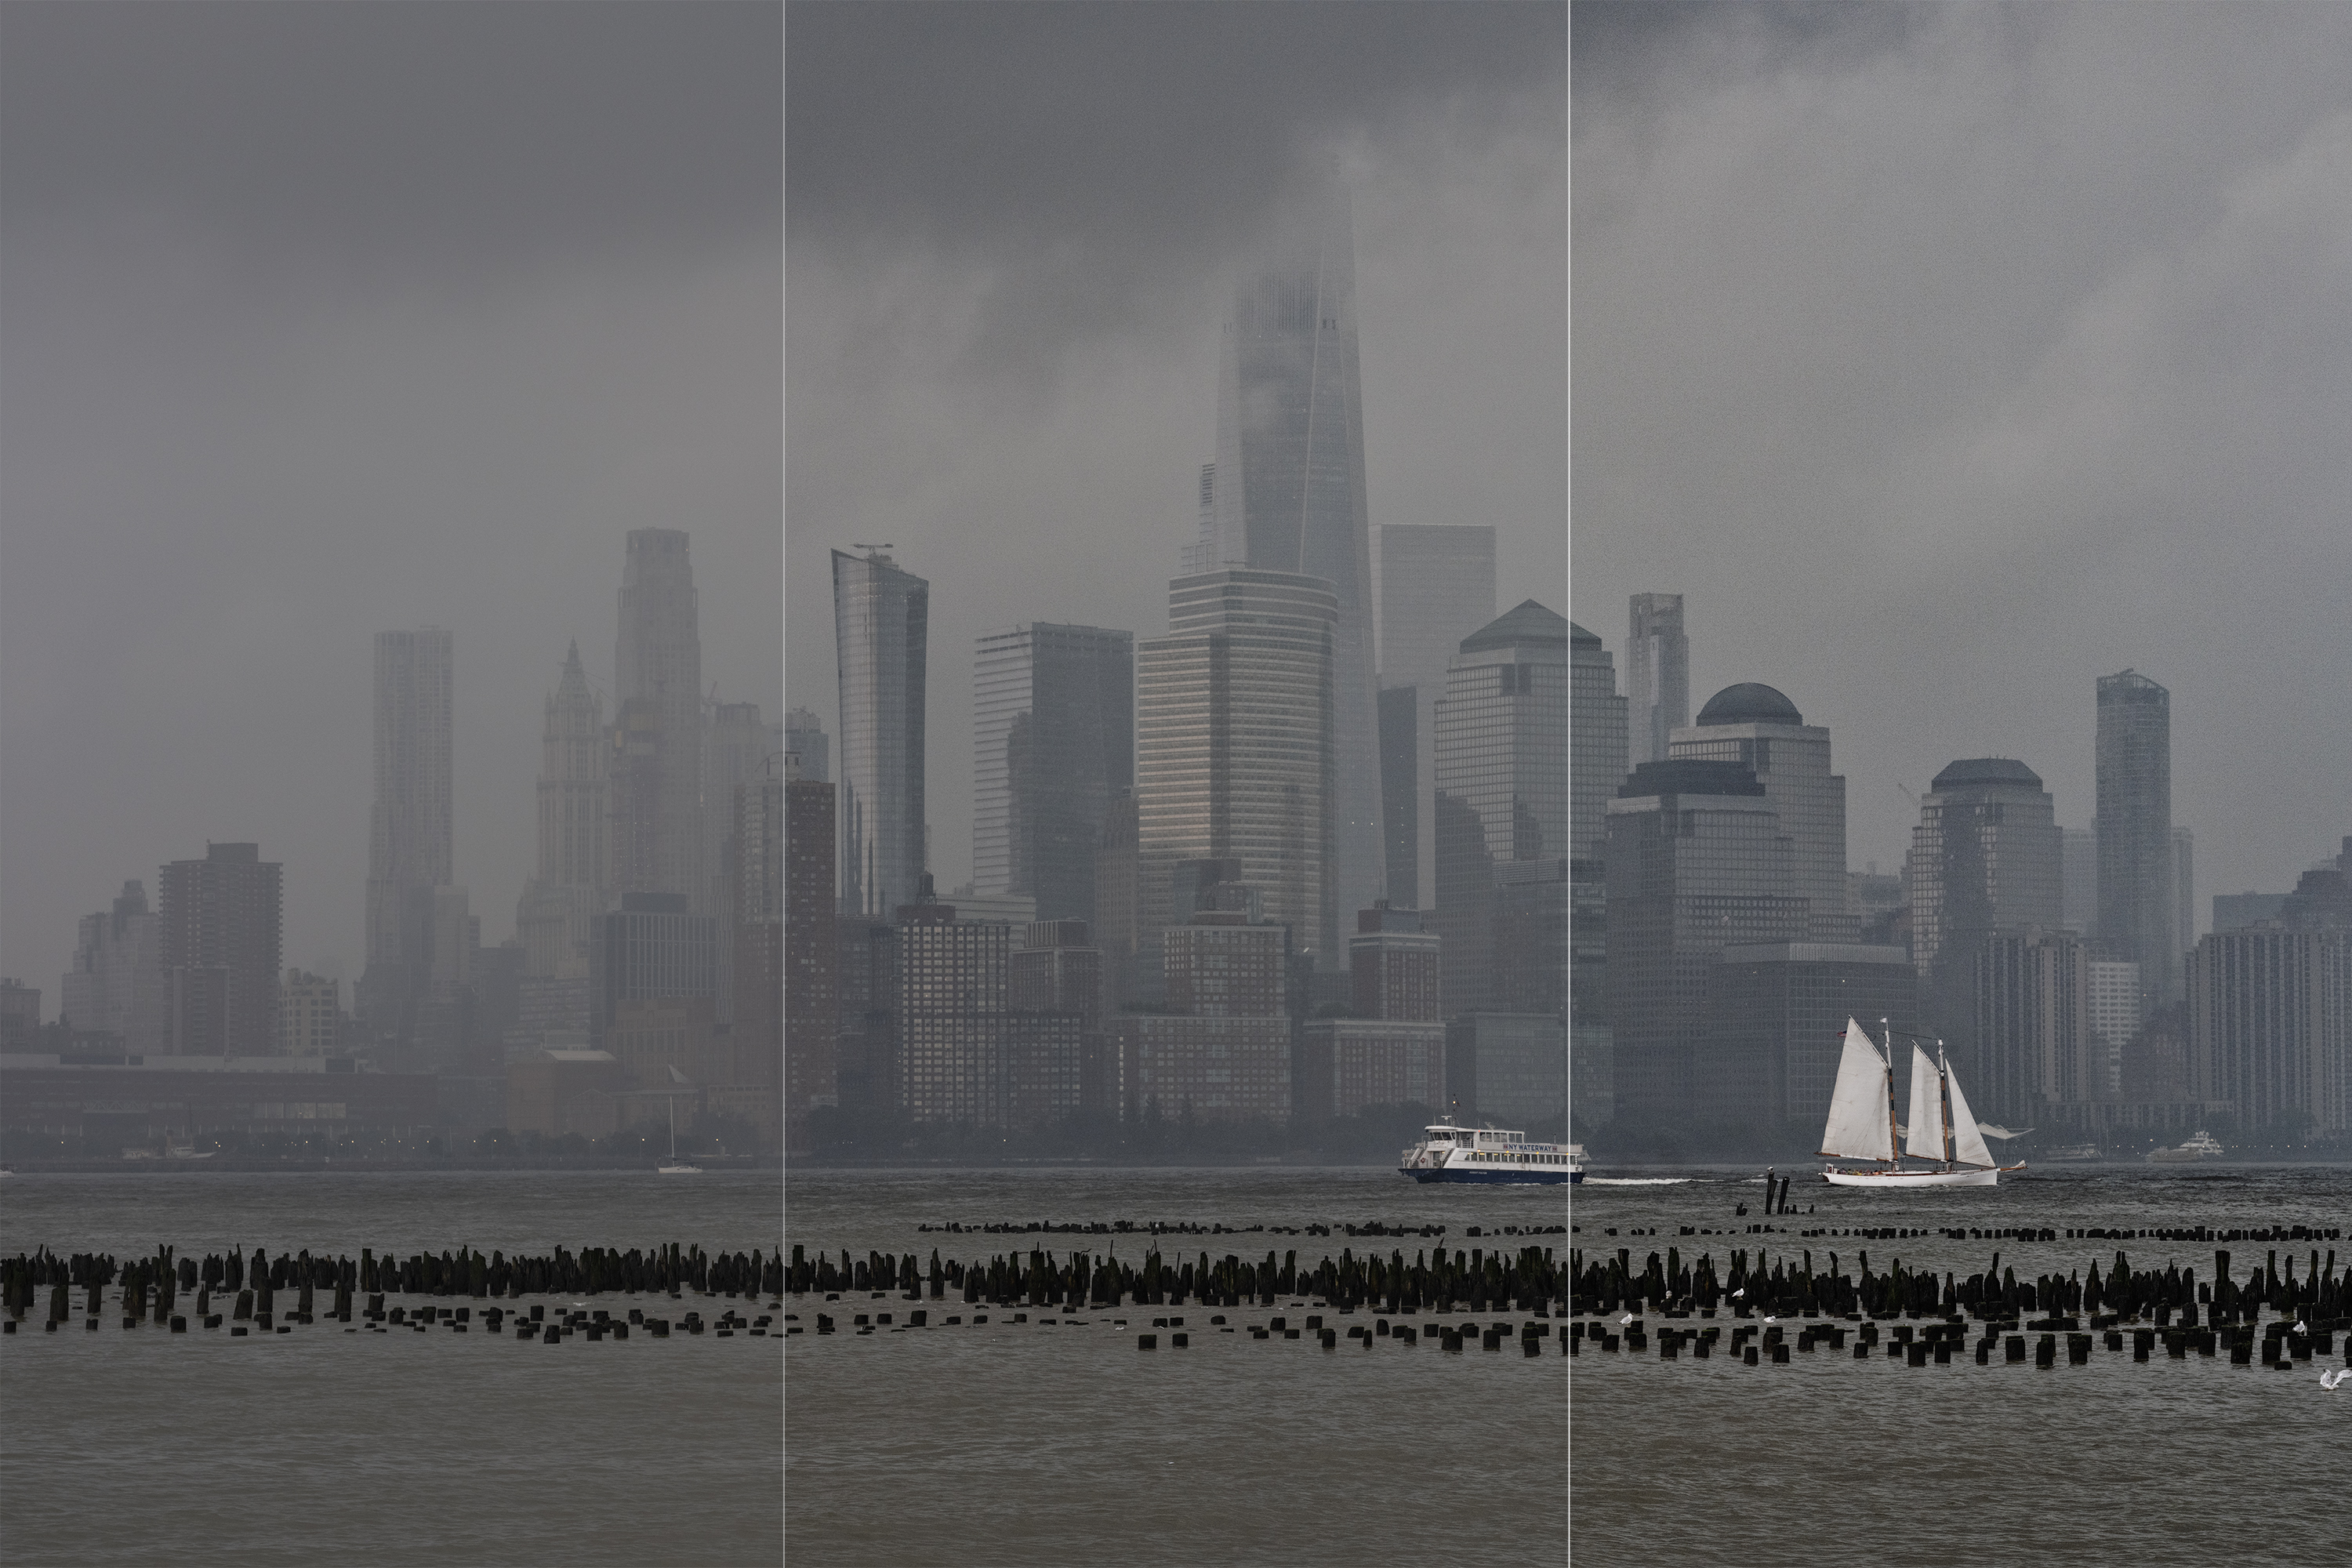
The ClearView option is also available; the slider is on the right side of the interface, above the Film Grain drop-down. It's a technical addition to the creative app that cuts through atmospheric haze and fog. Making photos in these conditions can lead to a very moody look, but also decreases contrast and detail. I took a photo of a fog-drenched downtown Manhattan, above, and split the look into three panels. I didn't edit the leftmost portion, but the middle is at the 30% setting on the ClearView slider and the right is at 60%.
The Color Efex looks might not be as extreme as those in Analog Efex—there's plenty of room to adjust color in either app, but Color Efex skips the light leaks and toy camera effects. Alternatively, Lightroom Classic editors can turn to RNI All Films 5 for film looks. RNI is a little more convenient to use because it works fully within Lightroom and is totally nondestructive. It includes a wealth of emulsion emulations, too.

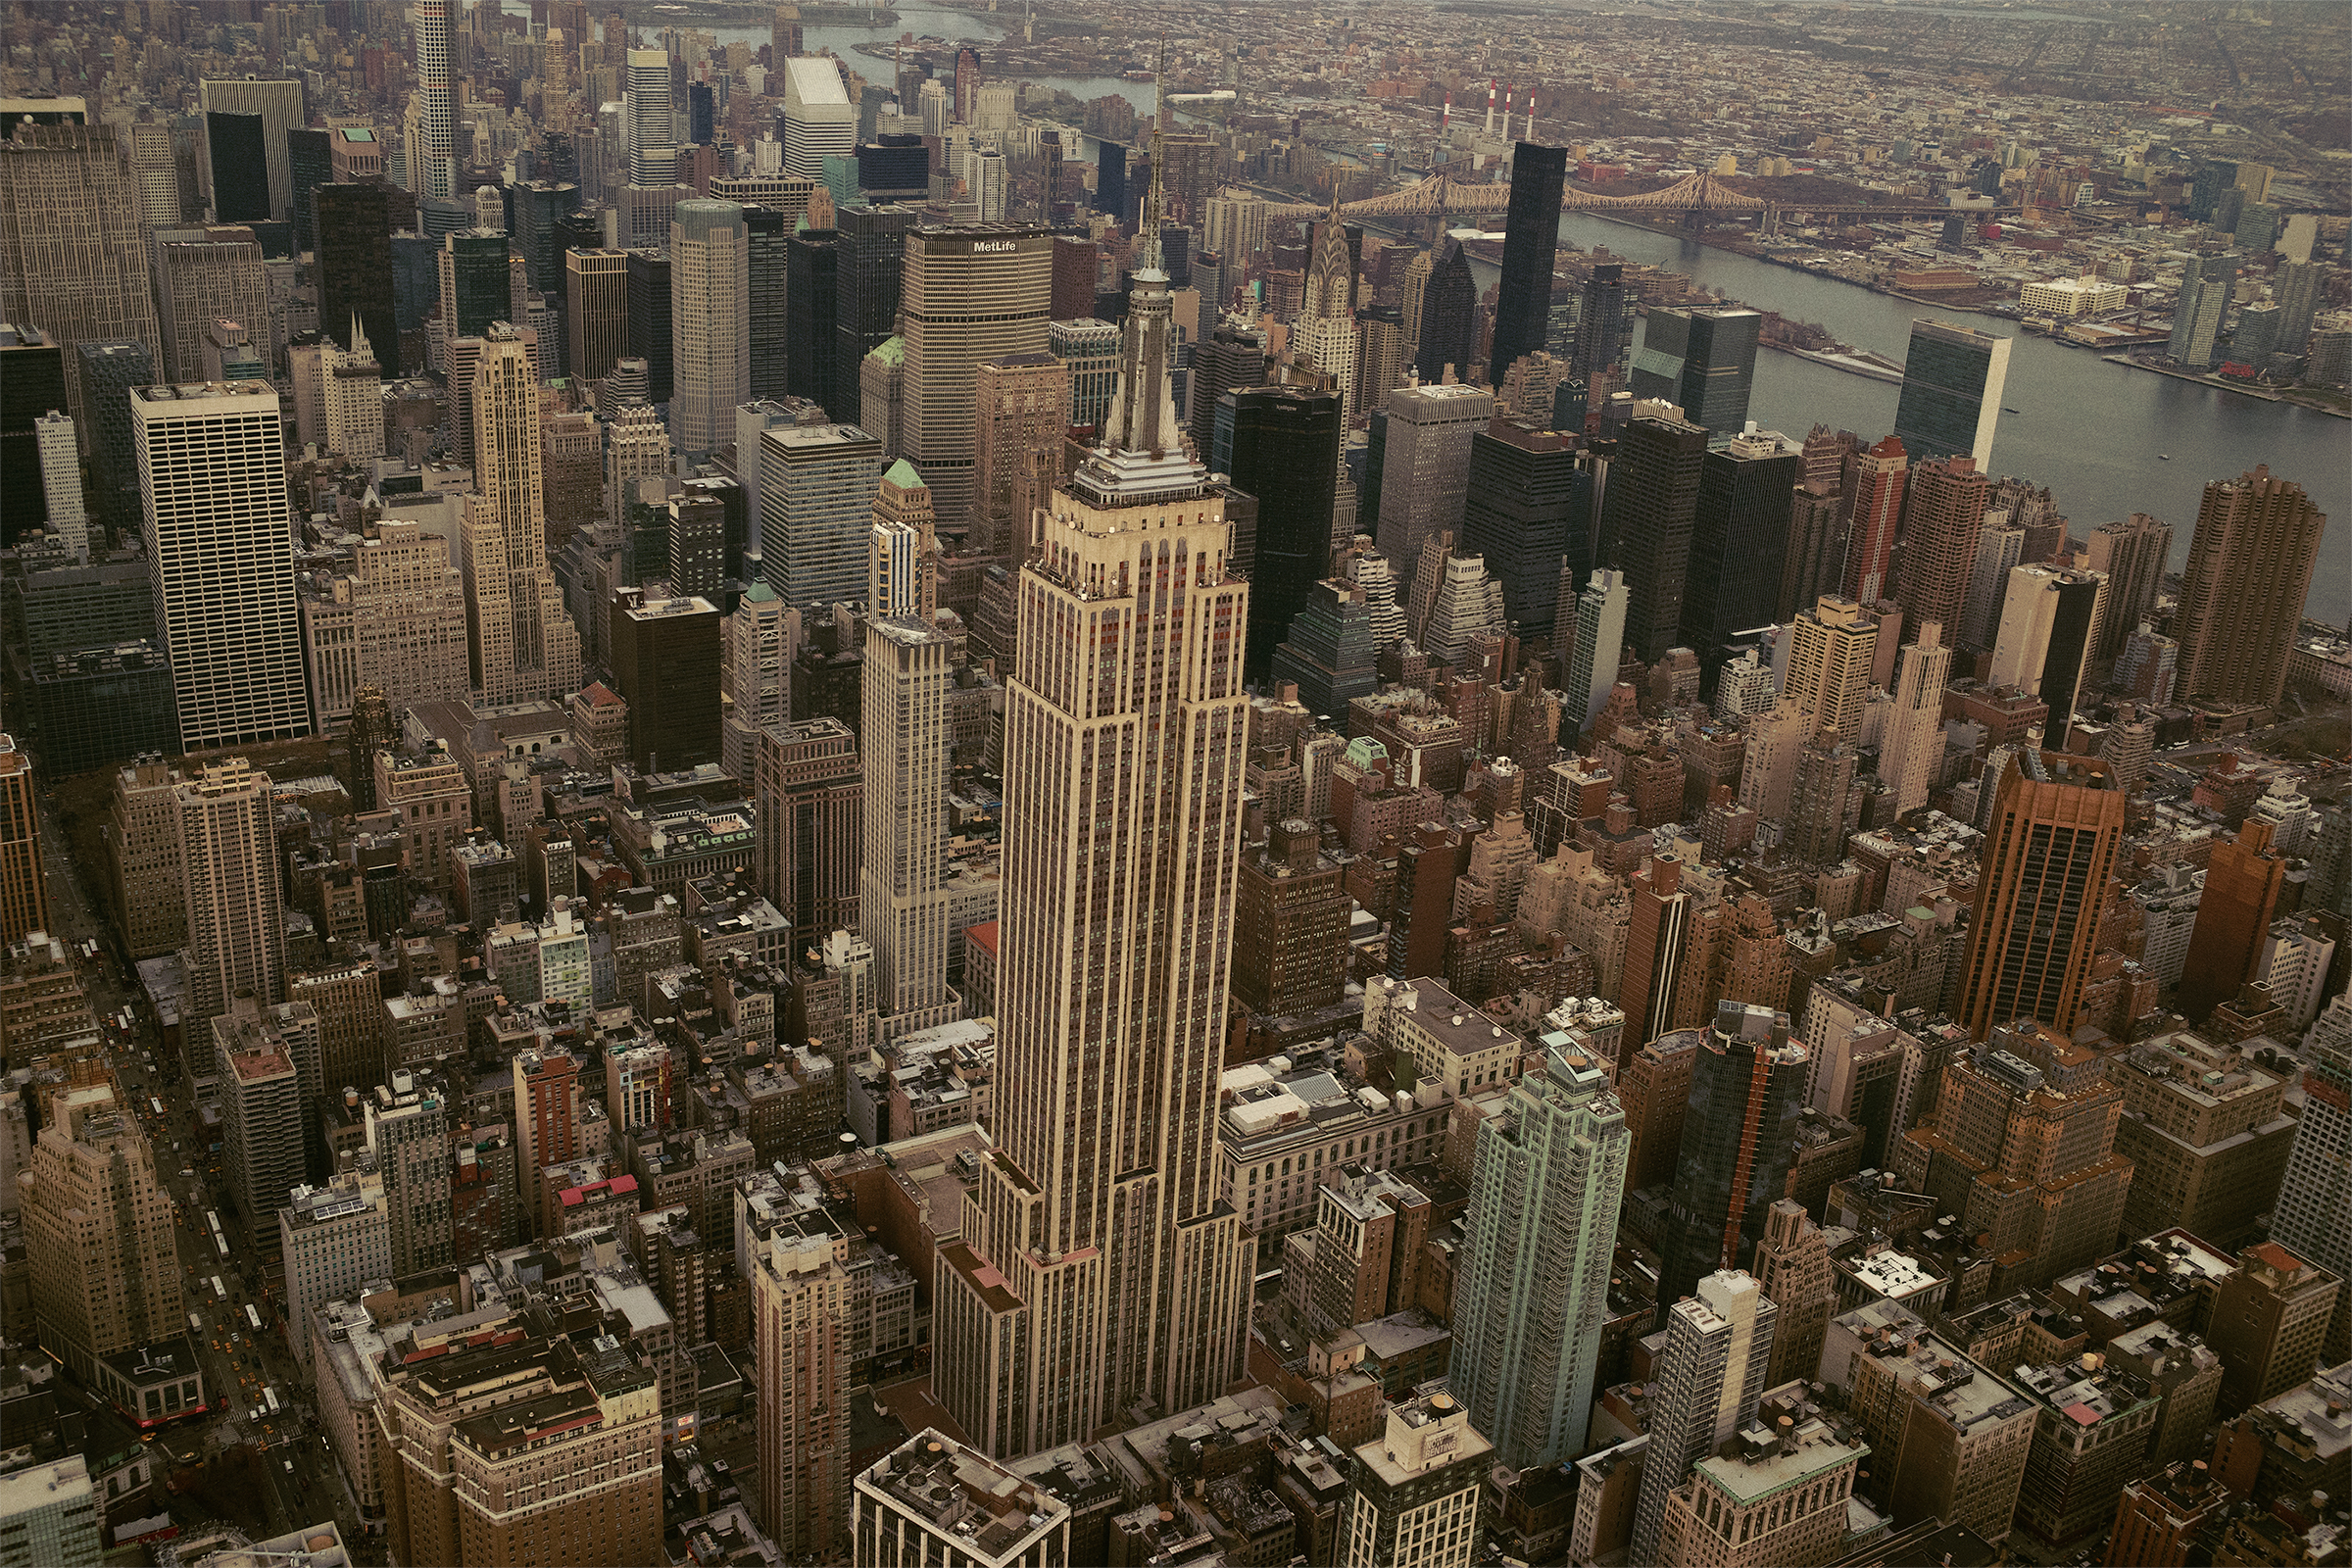
But you might find the different looks you can get from Color Efex to be worth it, not to mention the U Points for spot editing; they are much more flexible than Lightroom's local adjustments. In other words, with a bit of work, you can craft photos with the Nik Collection that aren't obtainable with a Lightroom preset. For the image above, I added a Bi-Color effect and some film grain to Color Efex's Lavender preset. The result simulates the look of C41 film developed in E6 chemicals.
HDR Efex Pro 2
HDR Efex is getting an update for Collection 6, but it's not coming out with the initial release. Instead, DxO plans to deliver it in July, as part of a free (for licensed owners) mid-cycle update. For now, HDR Efex Pro 2 gets a code upgrade for Apple Silicon, but no other new features.
Both Capture One and Lightroom can merge multiple shots to net one with more dynamic range. You can use the same technique, called High Dynamic Range (HDR) imaging, to blend multiple exposures for scenes with extreme shifts.
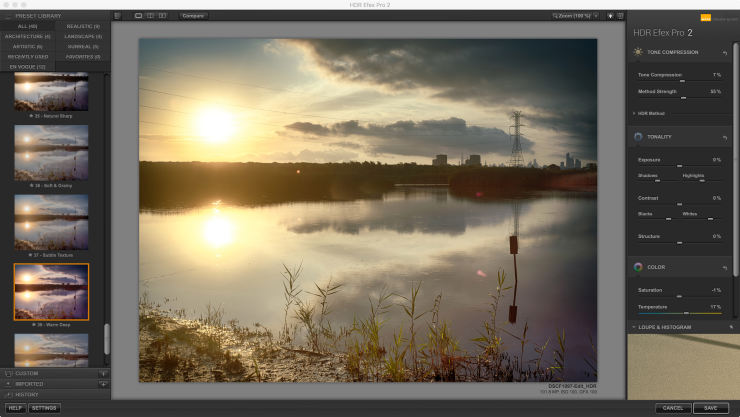
You might encounter shots in which you're not happy with what simple Raw processing can do to expand dynamic range. HDR Efex Pro offers several presets to help get you started in that scenario, as well as slider adjustments to control the intensity of the effect.
HDR images can look unnatural with too much processing and, although HDR Efex Pro certainly gives you the tools to craft photos with very high sharpening and localized contrast, the built-in presets trend toward more realistic looks.
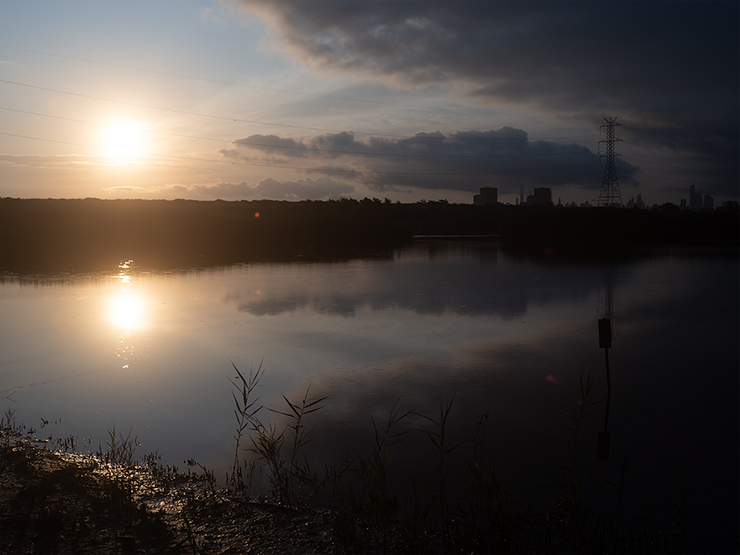
With modern image sensors, you don't always need multiple exposures to make HDR images. Take a look at the unprocessed Raw image shot above with the Fujifilm GFX100S, a tough scene with a lot of detail and the rising sun pointing directly into the lens.
I sent the 16-bit TIFF I created in Lightroom from the Raw file into HDR Efex Pro and cycled through many different starter looks for the finished shot. A single click pulls in highlights and opens up shadows, and I opted for the Tinted Structure look.
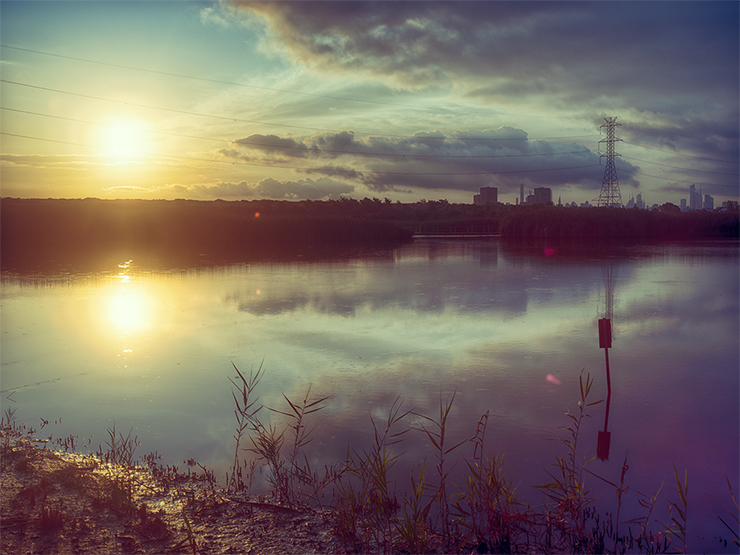
For most images, I'm typically happy with Lightroom's ability to eke out the right amount of dynamic range from a photo. But there are times when you want more than what Lightroom can manage with slider adjustments alone, even if you haven't made multiple exposures. Of course, HDR fans are used to taking multiple shots with varying levels of brightness. If that's you, a round trip to HDR Efex Pro is in order. It's not an everyday tool—for me, at least—but it's a beneficial one.
Silver Efex Pro 3
Nik's black-and-white conversion app, Silver Efex Pro, is what has kept me interested in the Collection. Silver Efex received its last major update in Collection 4; there are no major changes this year. As with the other apps, the Mac version is now native to Apple Silicon and U Points gets support for Control Line adjustments.
The interface is more modern, though. The control palettes feature cleaner, floating designs that better match the look of menus in other creative apps. The sliders are a bit more useful, with graduated marks and more granular control, too. Instead of a single Structure adjustment, for instance, you get six separate aspects of adjustment, and that's just one example.
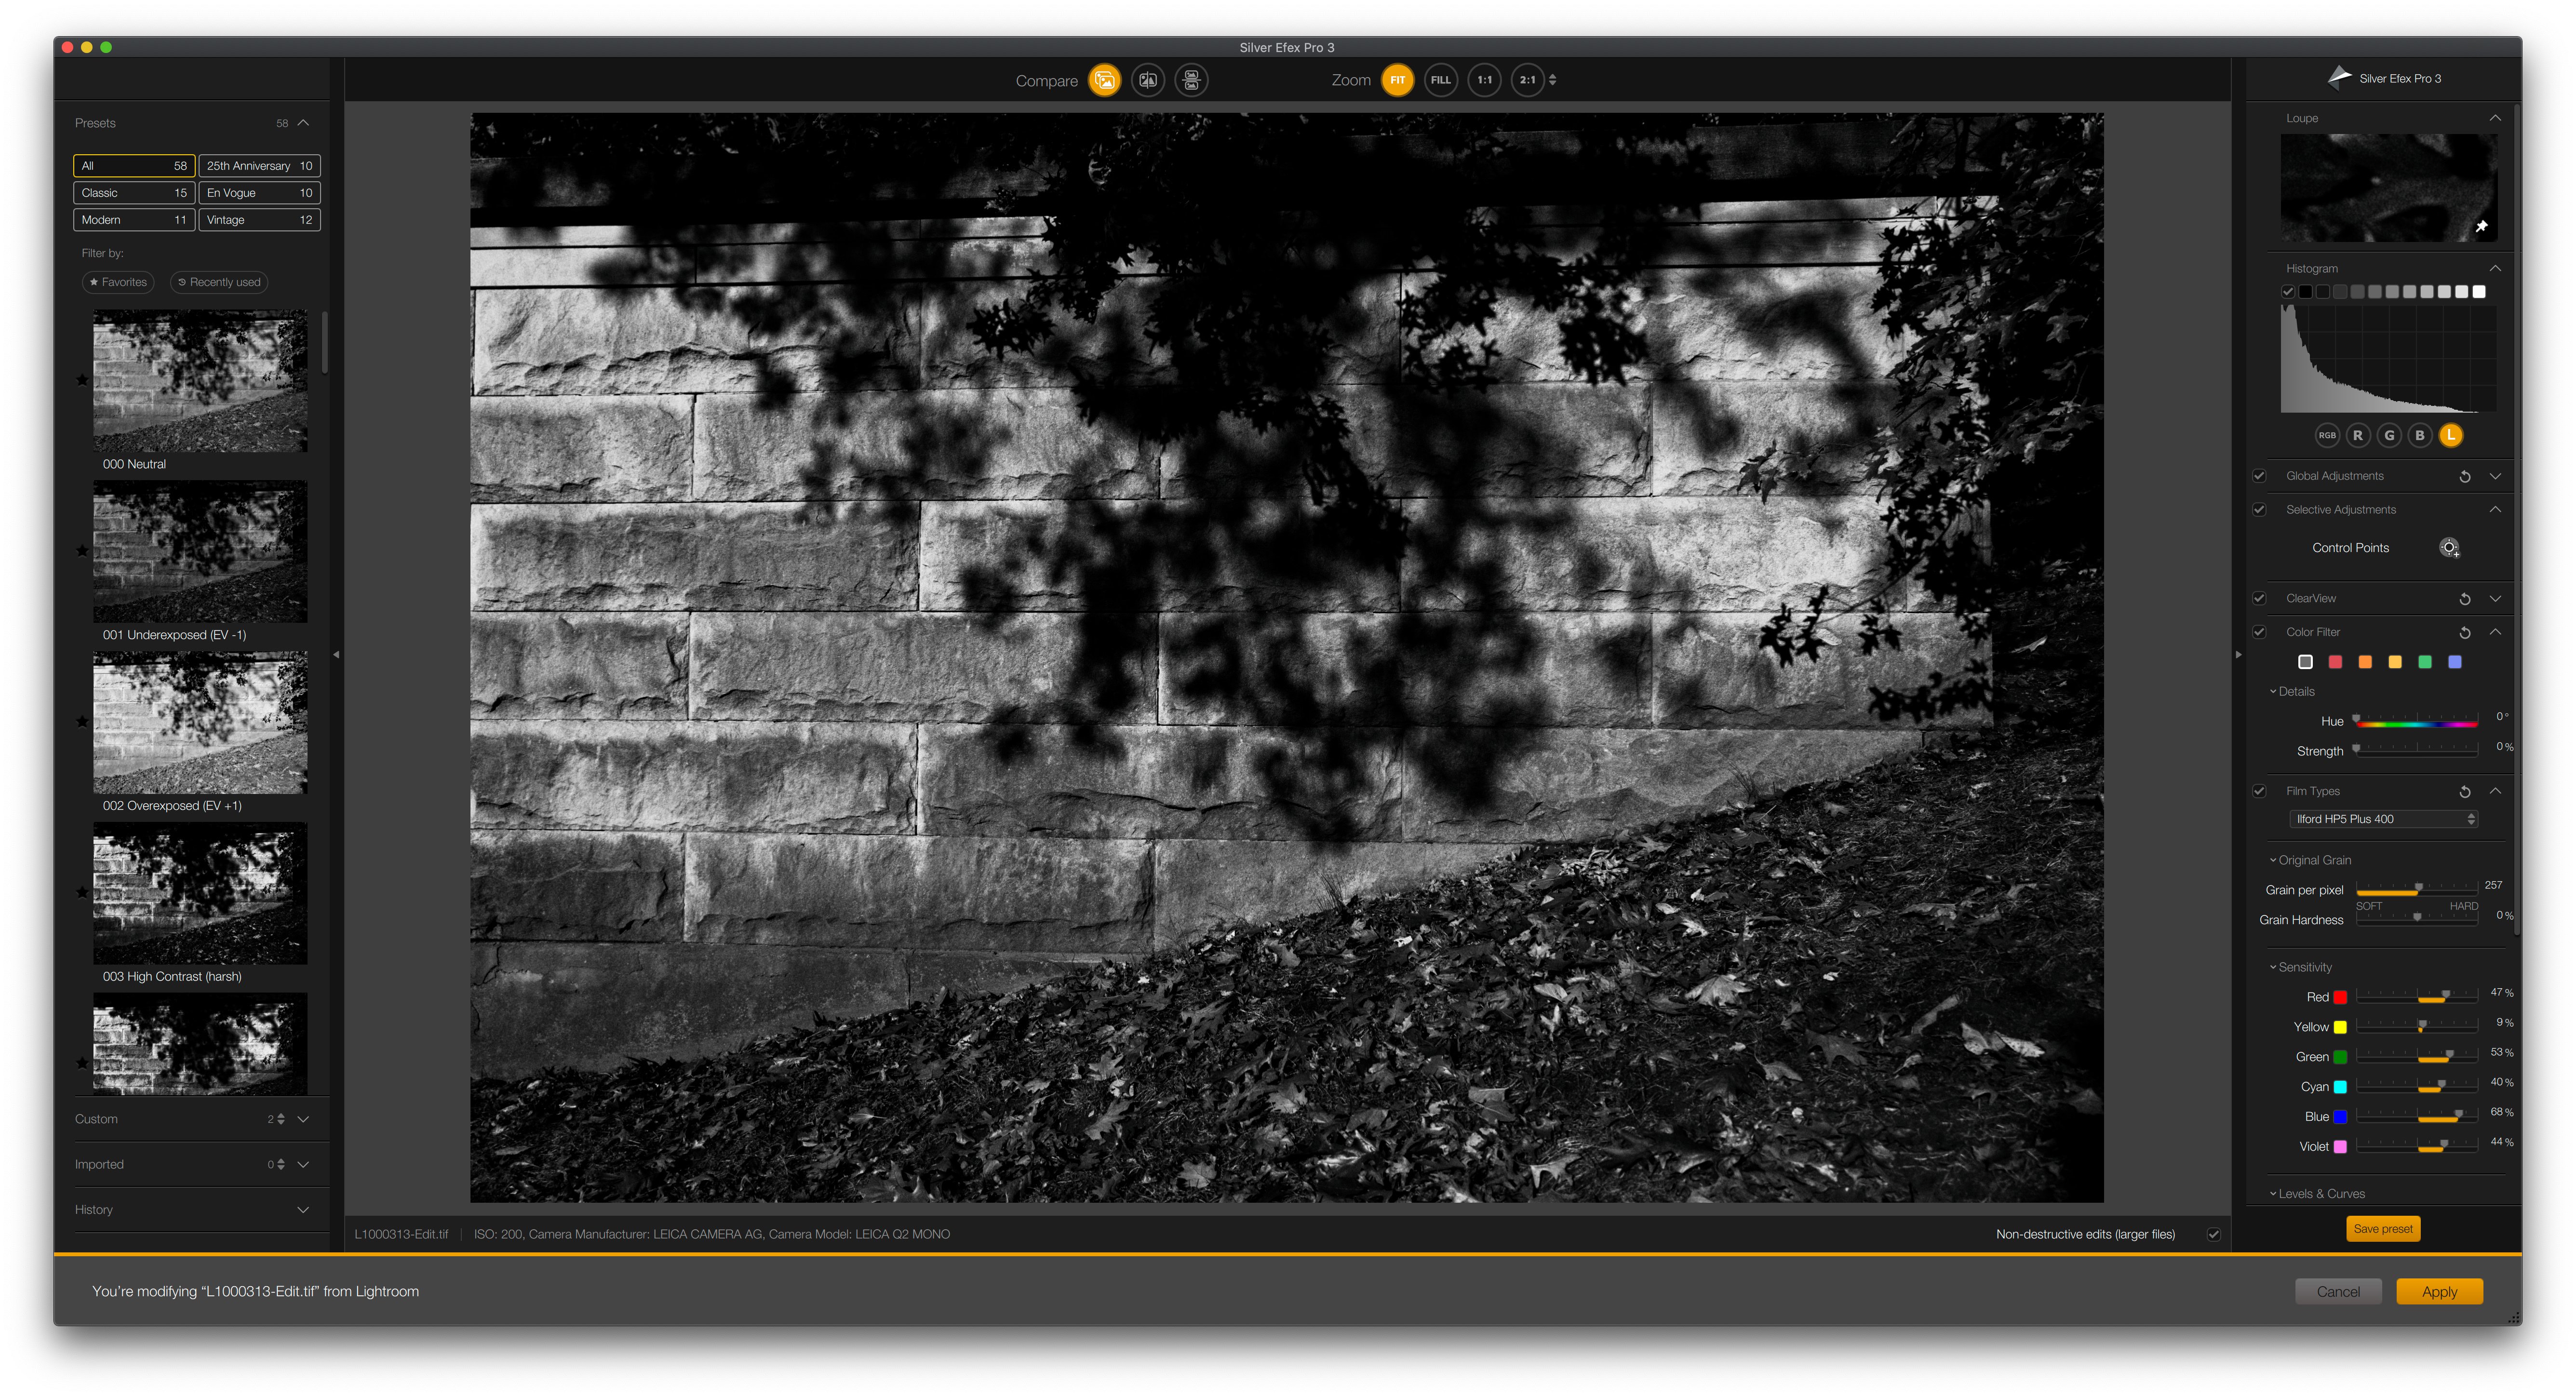
When I have the pleasure of using the software along with Raw images from a dedicated black-and-white camera like the Leica M Monochrom (Typ 246) or Phase One Achromatic, the output is as close to film photography as I've seen from a digital sensor. It's especially useful if you're after the look of a specific film stock—Silver Efex emulates popular stocks from Agfa, Fujifilm, Ilford, Kodak, and others, complete with realistic grain.
But most people are likely to use this tool to convert color photos to monochrome. You can opt for the look of a specific film stock and, when you're working from a color source, its specific response to different colors in the spectrum comes into play, too. Virtual color filters are available—the digital edition of a red filter darkens blue skies just as well as a glass filter did in the days of film photography.

As with color looks, there are black-and-white presets available for Lightroom. Although I'm typically happy with what they bring to the table for color work, I've yet to find any that match Silver Efex for monochrome conversions. Adobe includes only a basic grain adjustment slider that doesn't come close to what Silver Efex offers.
Capture One's black-and-white toolset is a bit stronger than Adobe's, with several different grain styles. It's an application I use occasionally but, if it was my main Raw converter, I think I'd still opt for Silver Efex for monochrome work.
Perspective Efex
Perspective Efex is an app with two main functions: geometry corrections and the miniature effect. On the technical side, it offers single-click corrections for lens and perspective distortion, along with barrel and pincushion distortion profiles for 20 cameras and 60 lenses, a plus for architectural imaging. Its perspective tools are enhanced too, they now support localized perspective shifts for more complex perspective and distortion correction.
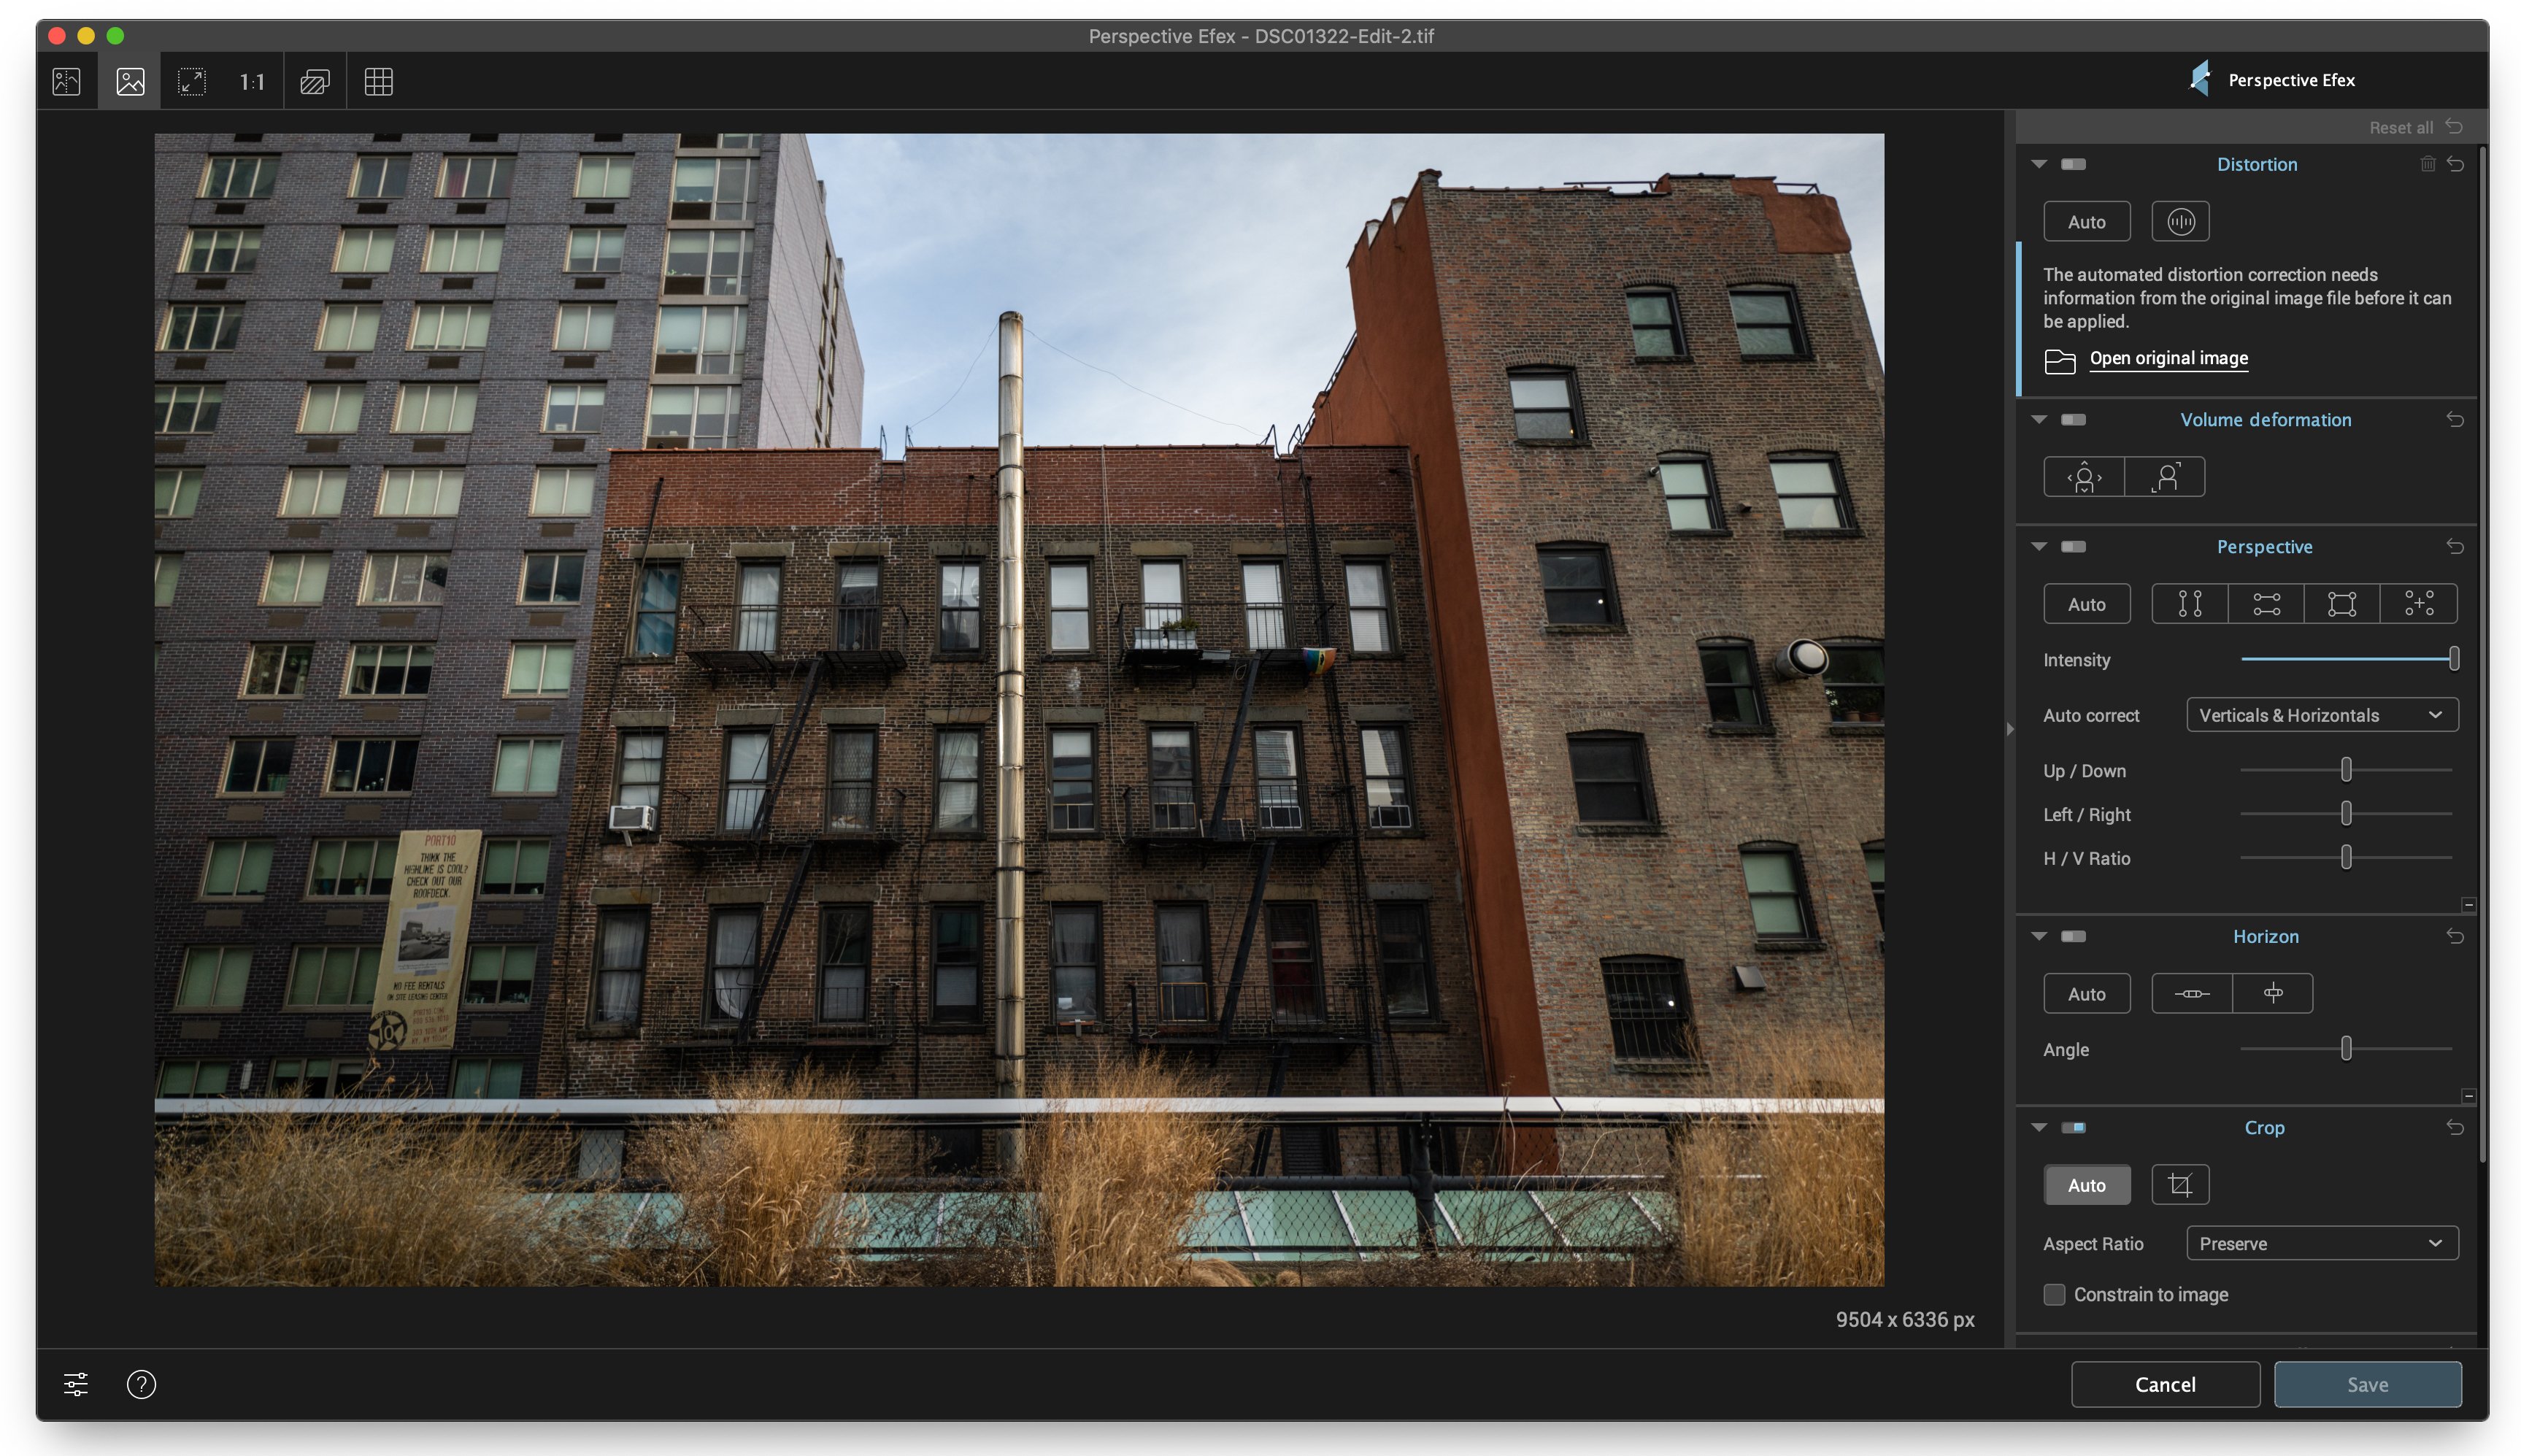
Perspective Efex comes in handy for shots like the one above, in which the camera was angled up to get the tops of buildings in the frame. The off-kilter perspective creates a keystone distortion effect. With a single click, Perspective Efex straightens the lines, though it crops the photo a bit in the process. You can opt to keep the original aspect ratio or set a manual crop—for this one, I went with a 5:4 ratio instead of the original 3:2.
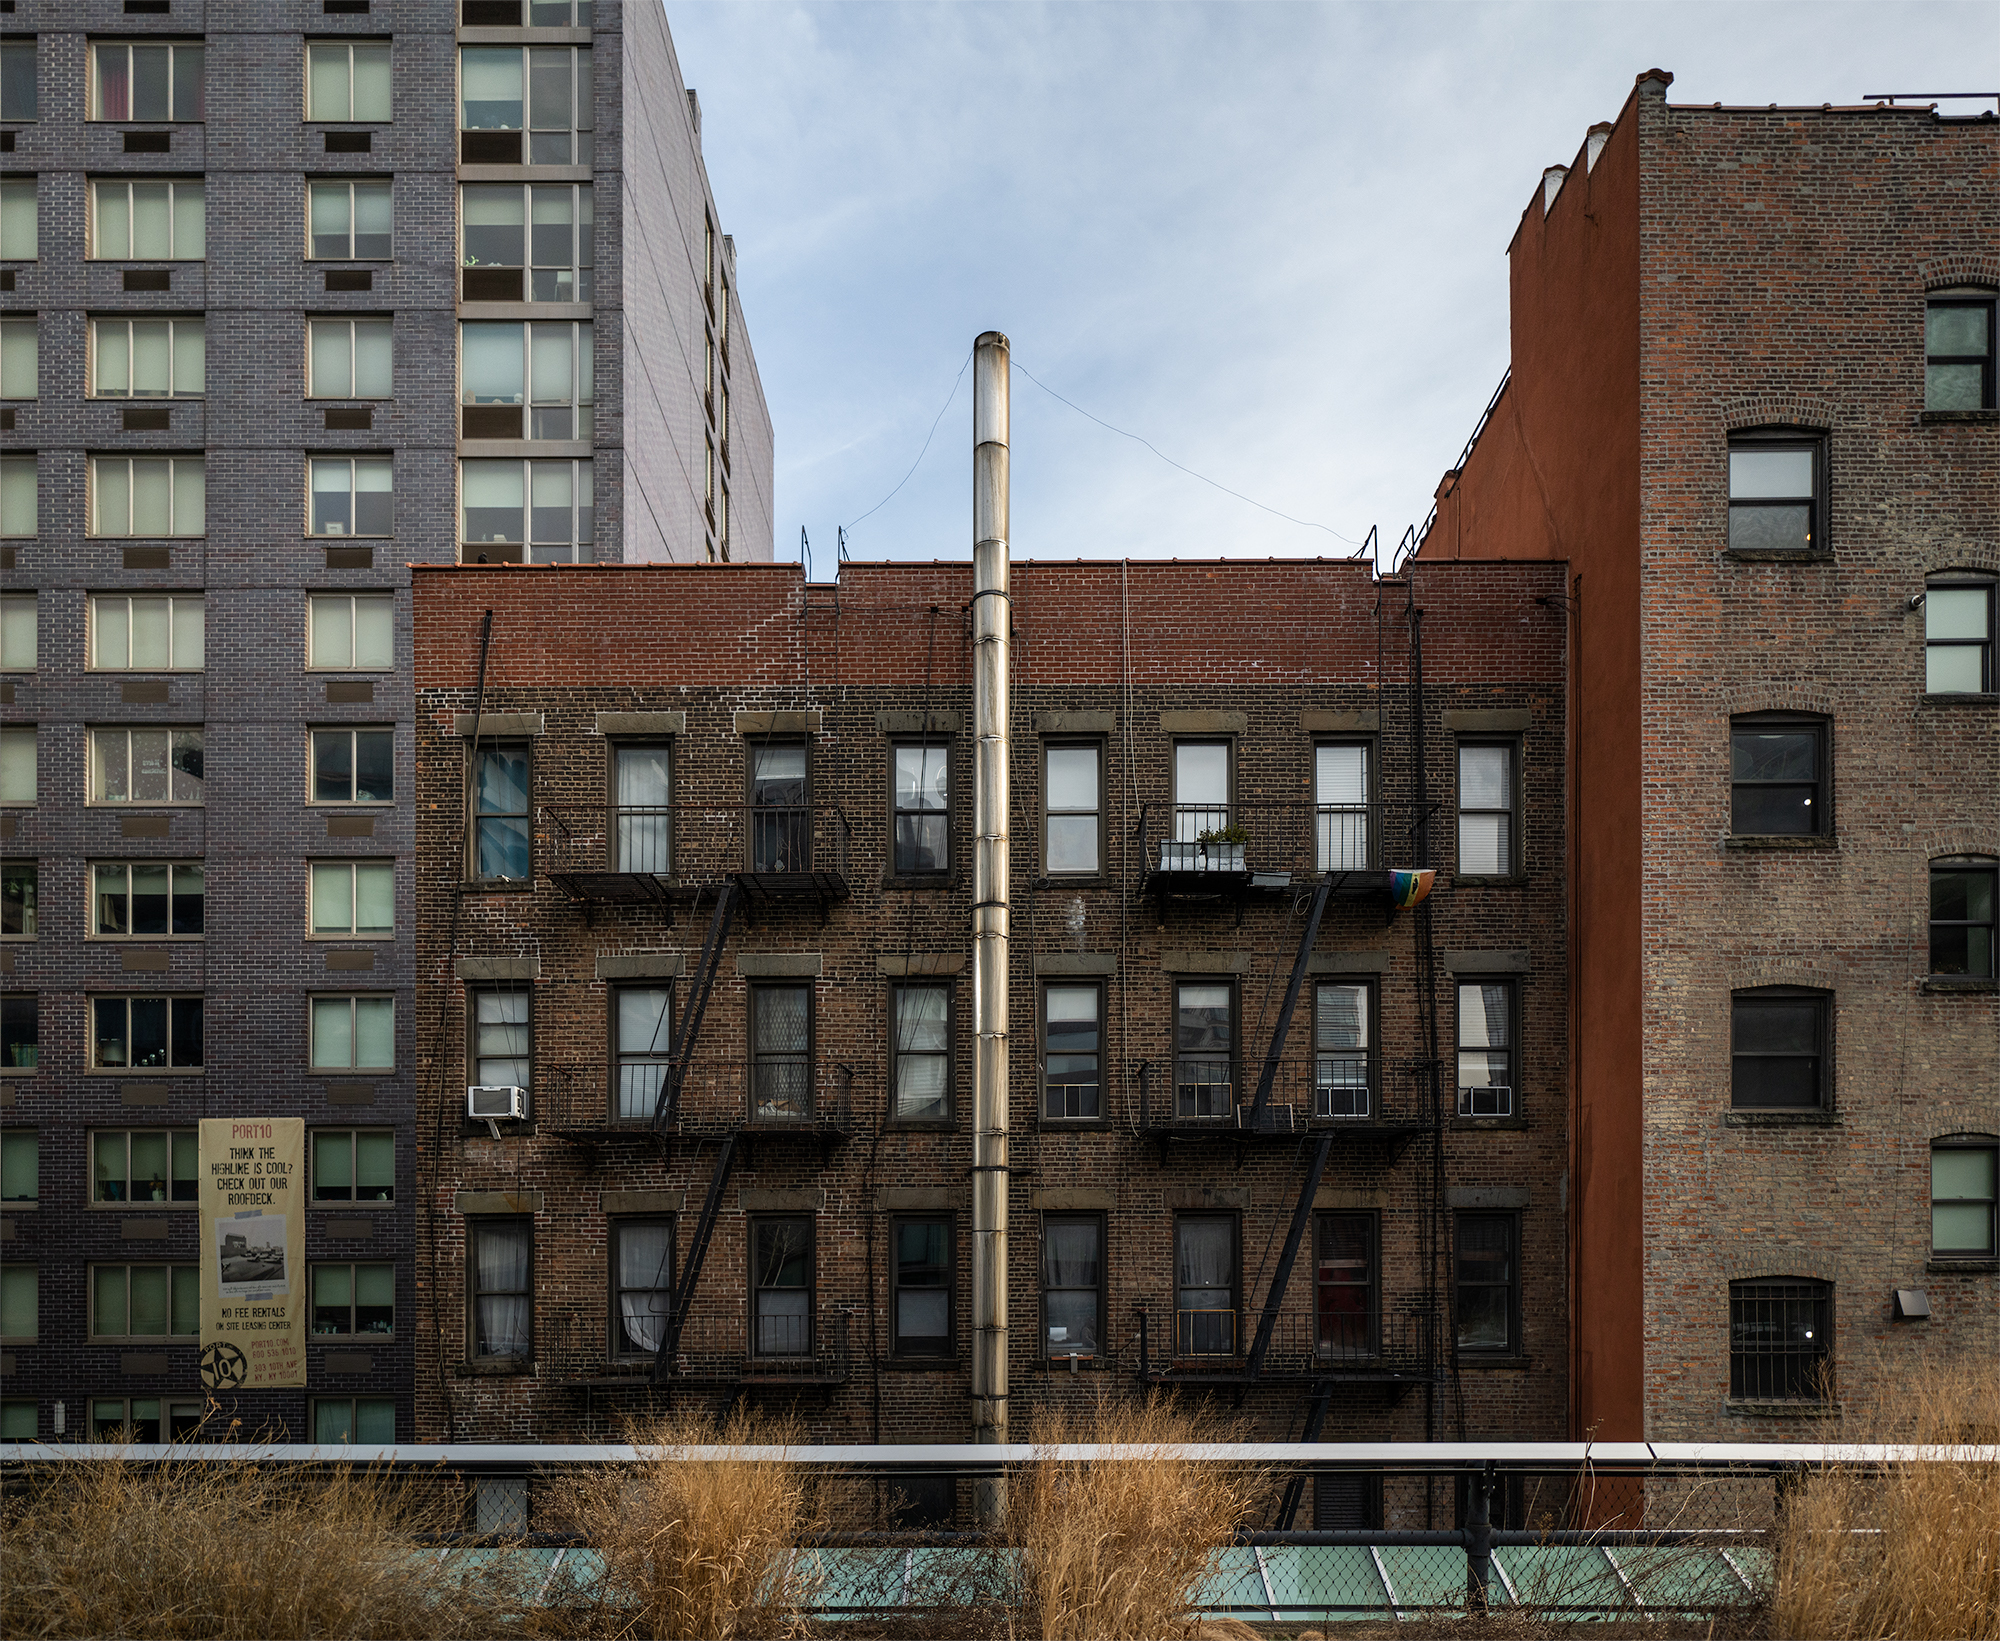
The application works well, though your existing Raw converter may already cover its main function. For instance, Lightroom can correct the same photo with its Upright tool.
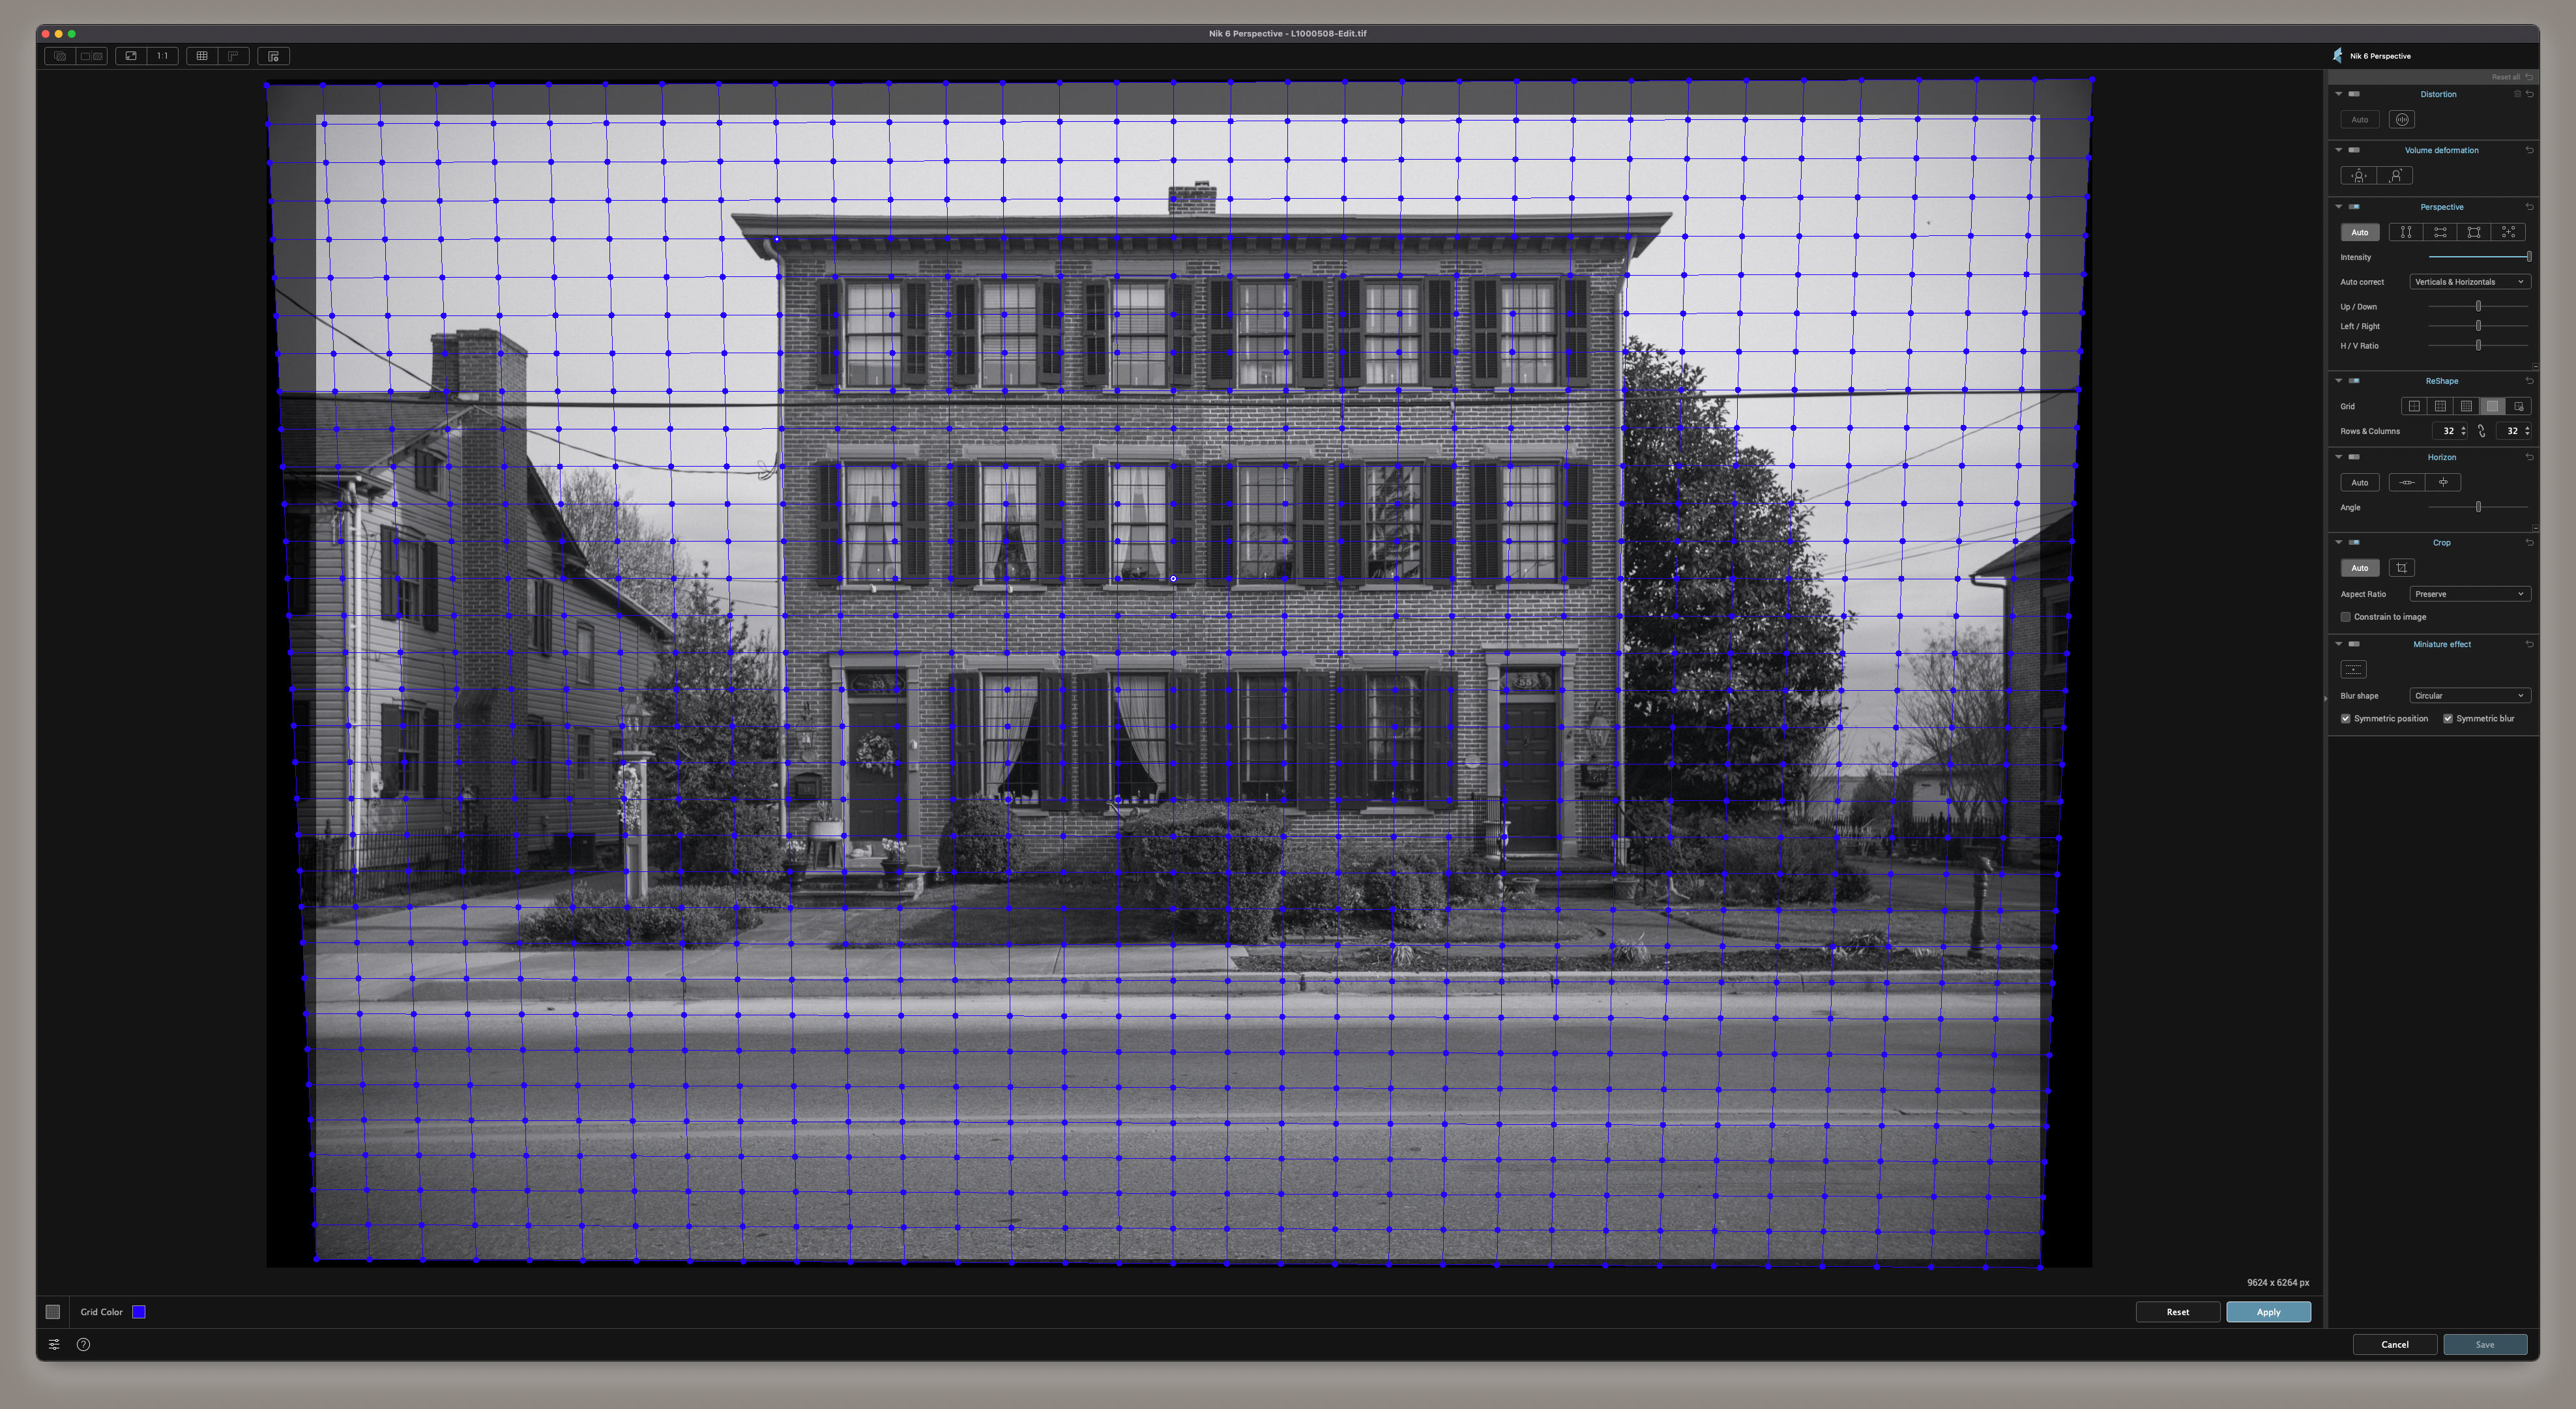
For scenes that require more precise adjustment (or those with complex geometric features that stymie automatic tools), Nik Collection 6 adds a ReShape tool to Perspective Efex. The tool adds a grid overlay adjustment with 4-by-4, 8-by-8, 16-by-16, and 32-by-32 arrays as options. You can drag and drop any square in the grid to adjust angles and geometry.
Creative photographers have another use for Perspective Efex, though, as mentioned—the miniature effect. It's useful for simulating the look you get from a tilt-shift lens. Collection 6 adds a Symmetry tool too, so you can easily create images with a symmetrical reflection effect.
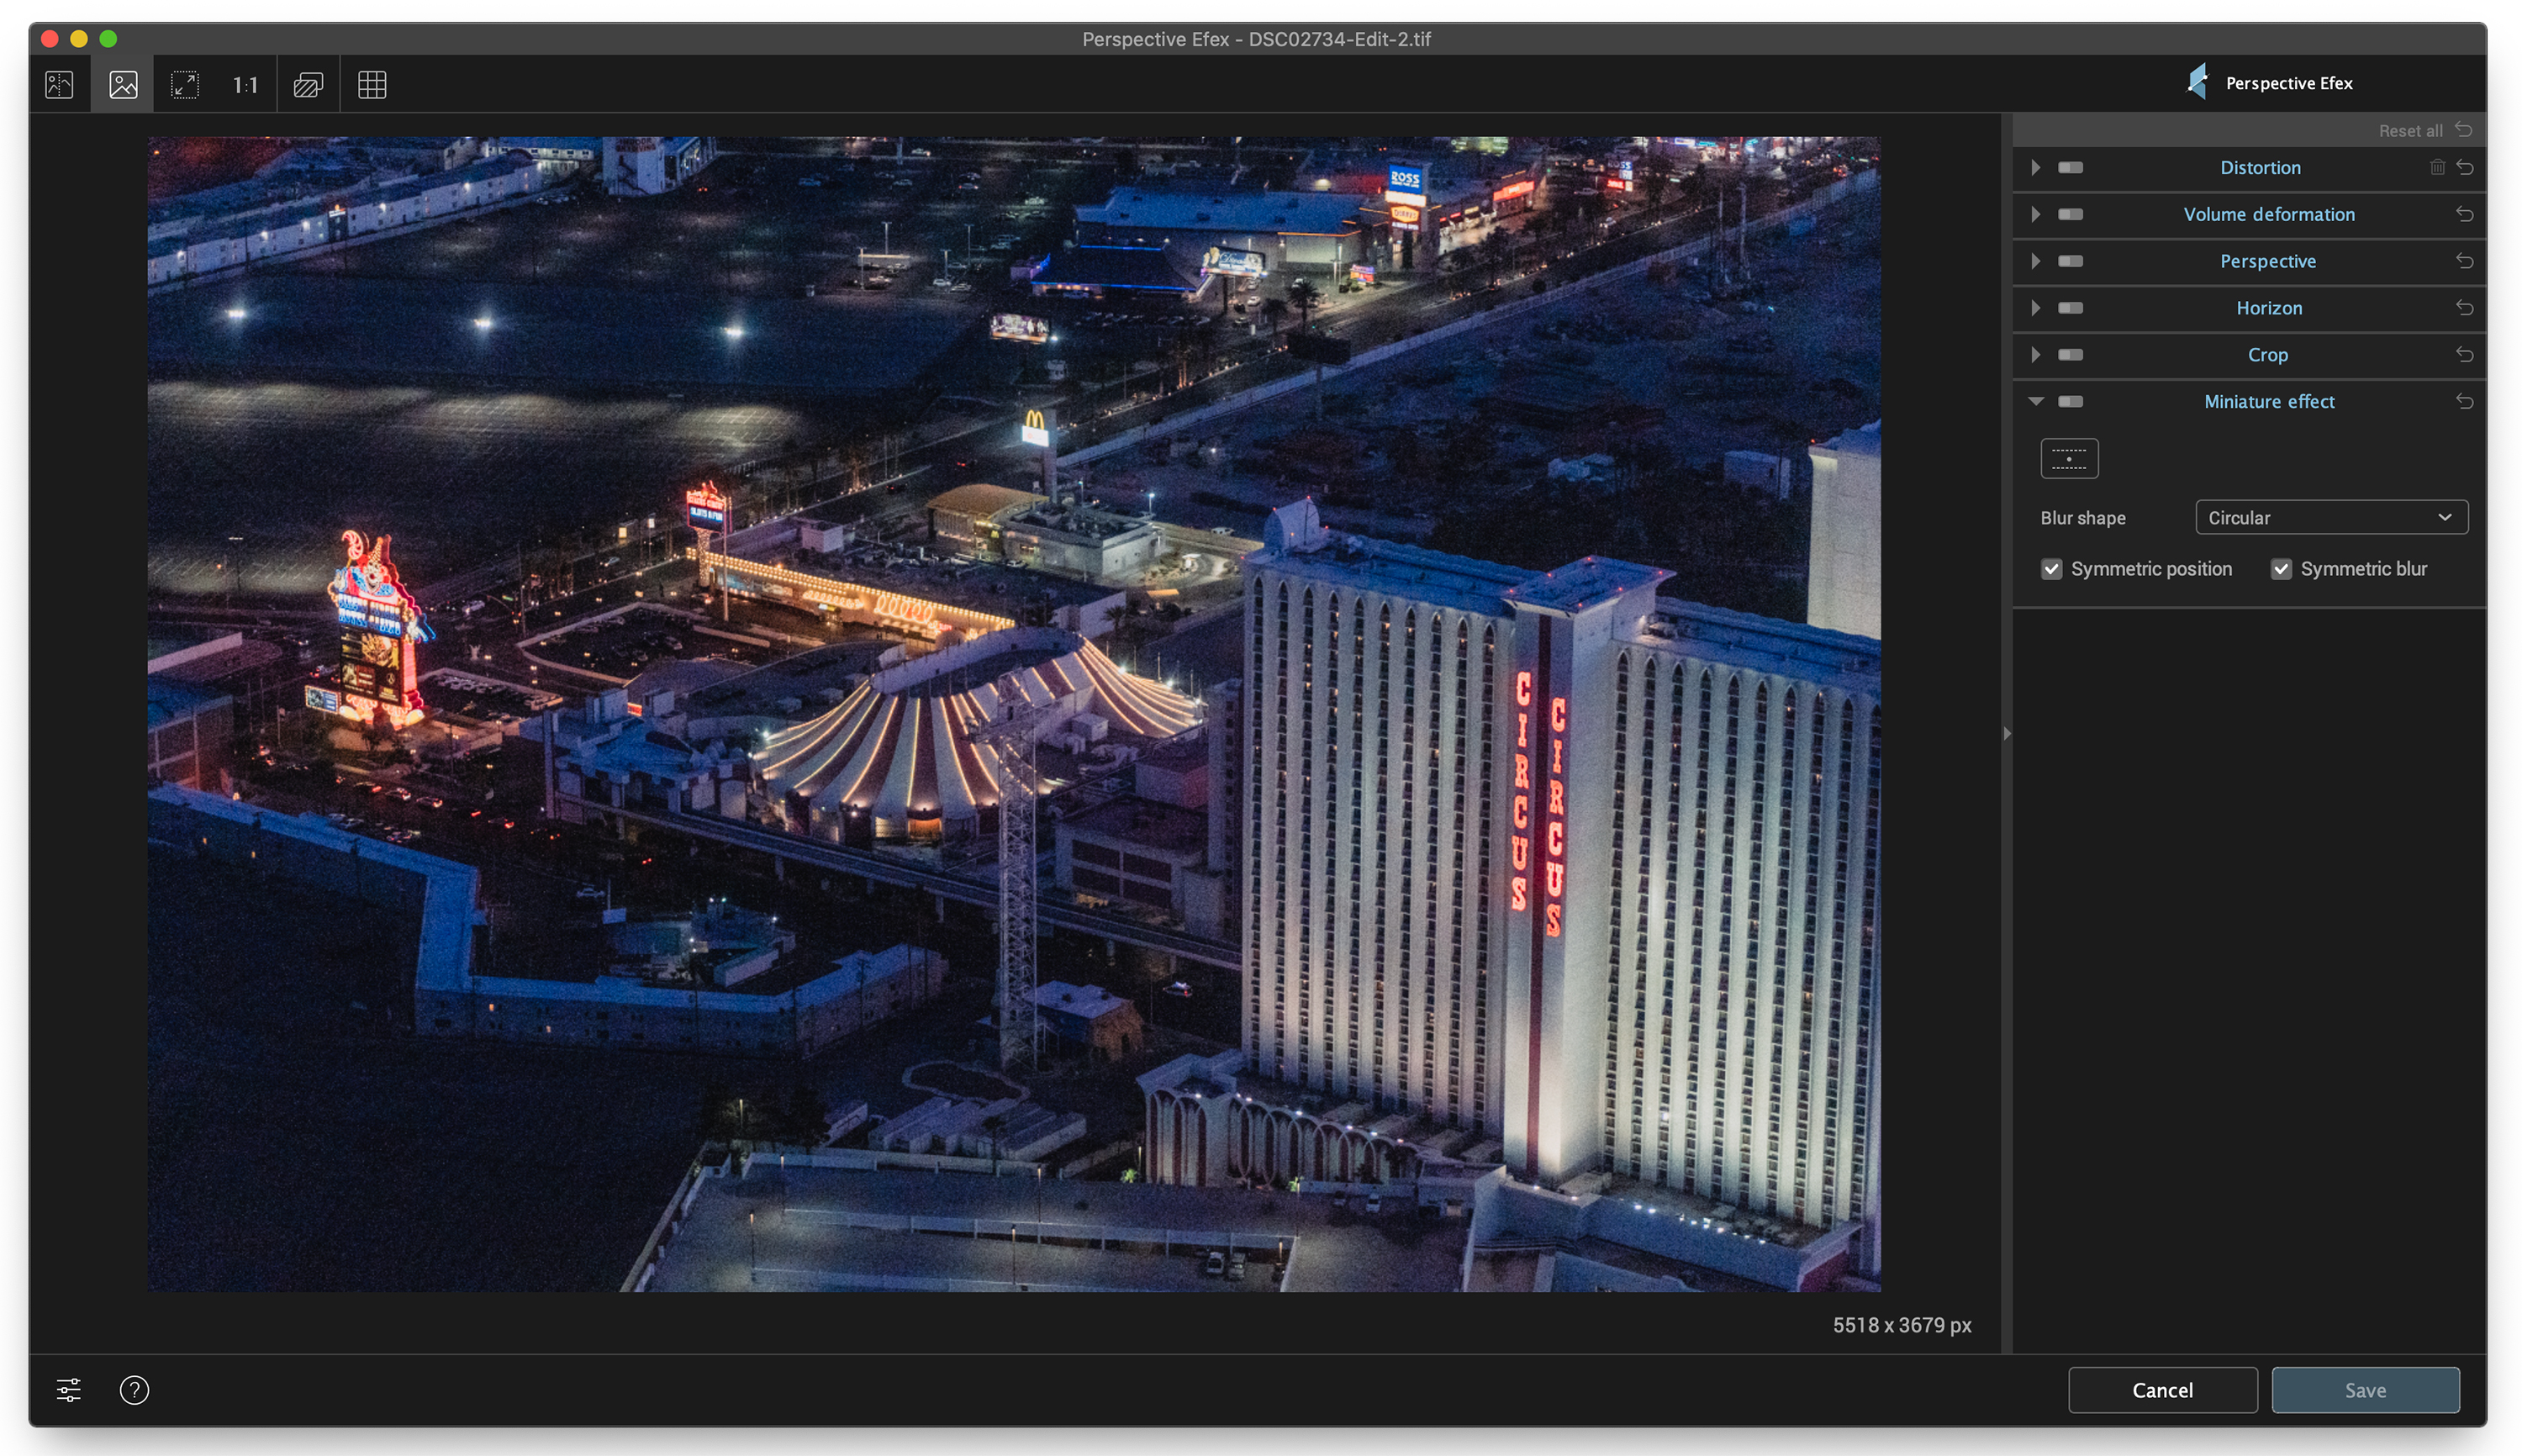
Lenses of this type move their optics so they're not parallel to the image sensor. Applying the look to wide, high shots of cityscapes makes them look a lot like a diorama shot with a traditional macro lens.
Perspective Efex makes it a simple matter to add this effect to any shot. I took an image I made during a helicopter flight around the Las Vegas strip and loaded it in the software. By default, Miniature Effect applies a straight line across the center of the image, but it's a simple matter to reposition it.

You can also control the intensity of the blur effect and reposition it, or simulate the blur effects of various aperture shapes. You can make symmetric changes by applying the same adjustment to both defocused areas of the image or work on them independently. Results show up on the screen immediately, thus giving you a bit of freedom to fine-tune the effect to your preference.
Viveza 3
Viveza is an app for color work that features the same modern interface as the other creative apps in the suite; Analog, Color, and Silver Efex. For version 6, it gets Apple Silicon support and access to U Point Control Lines.
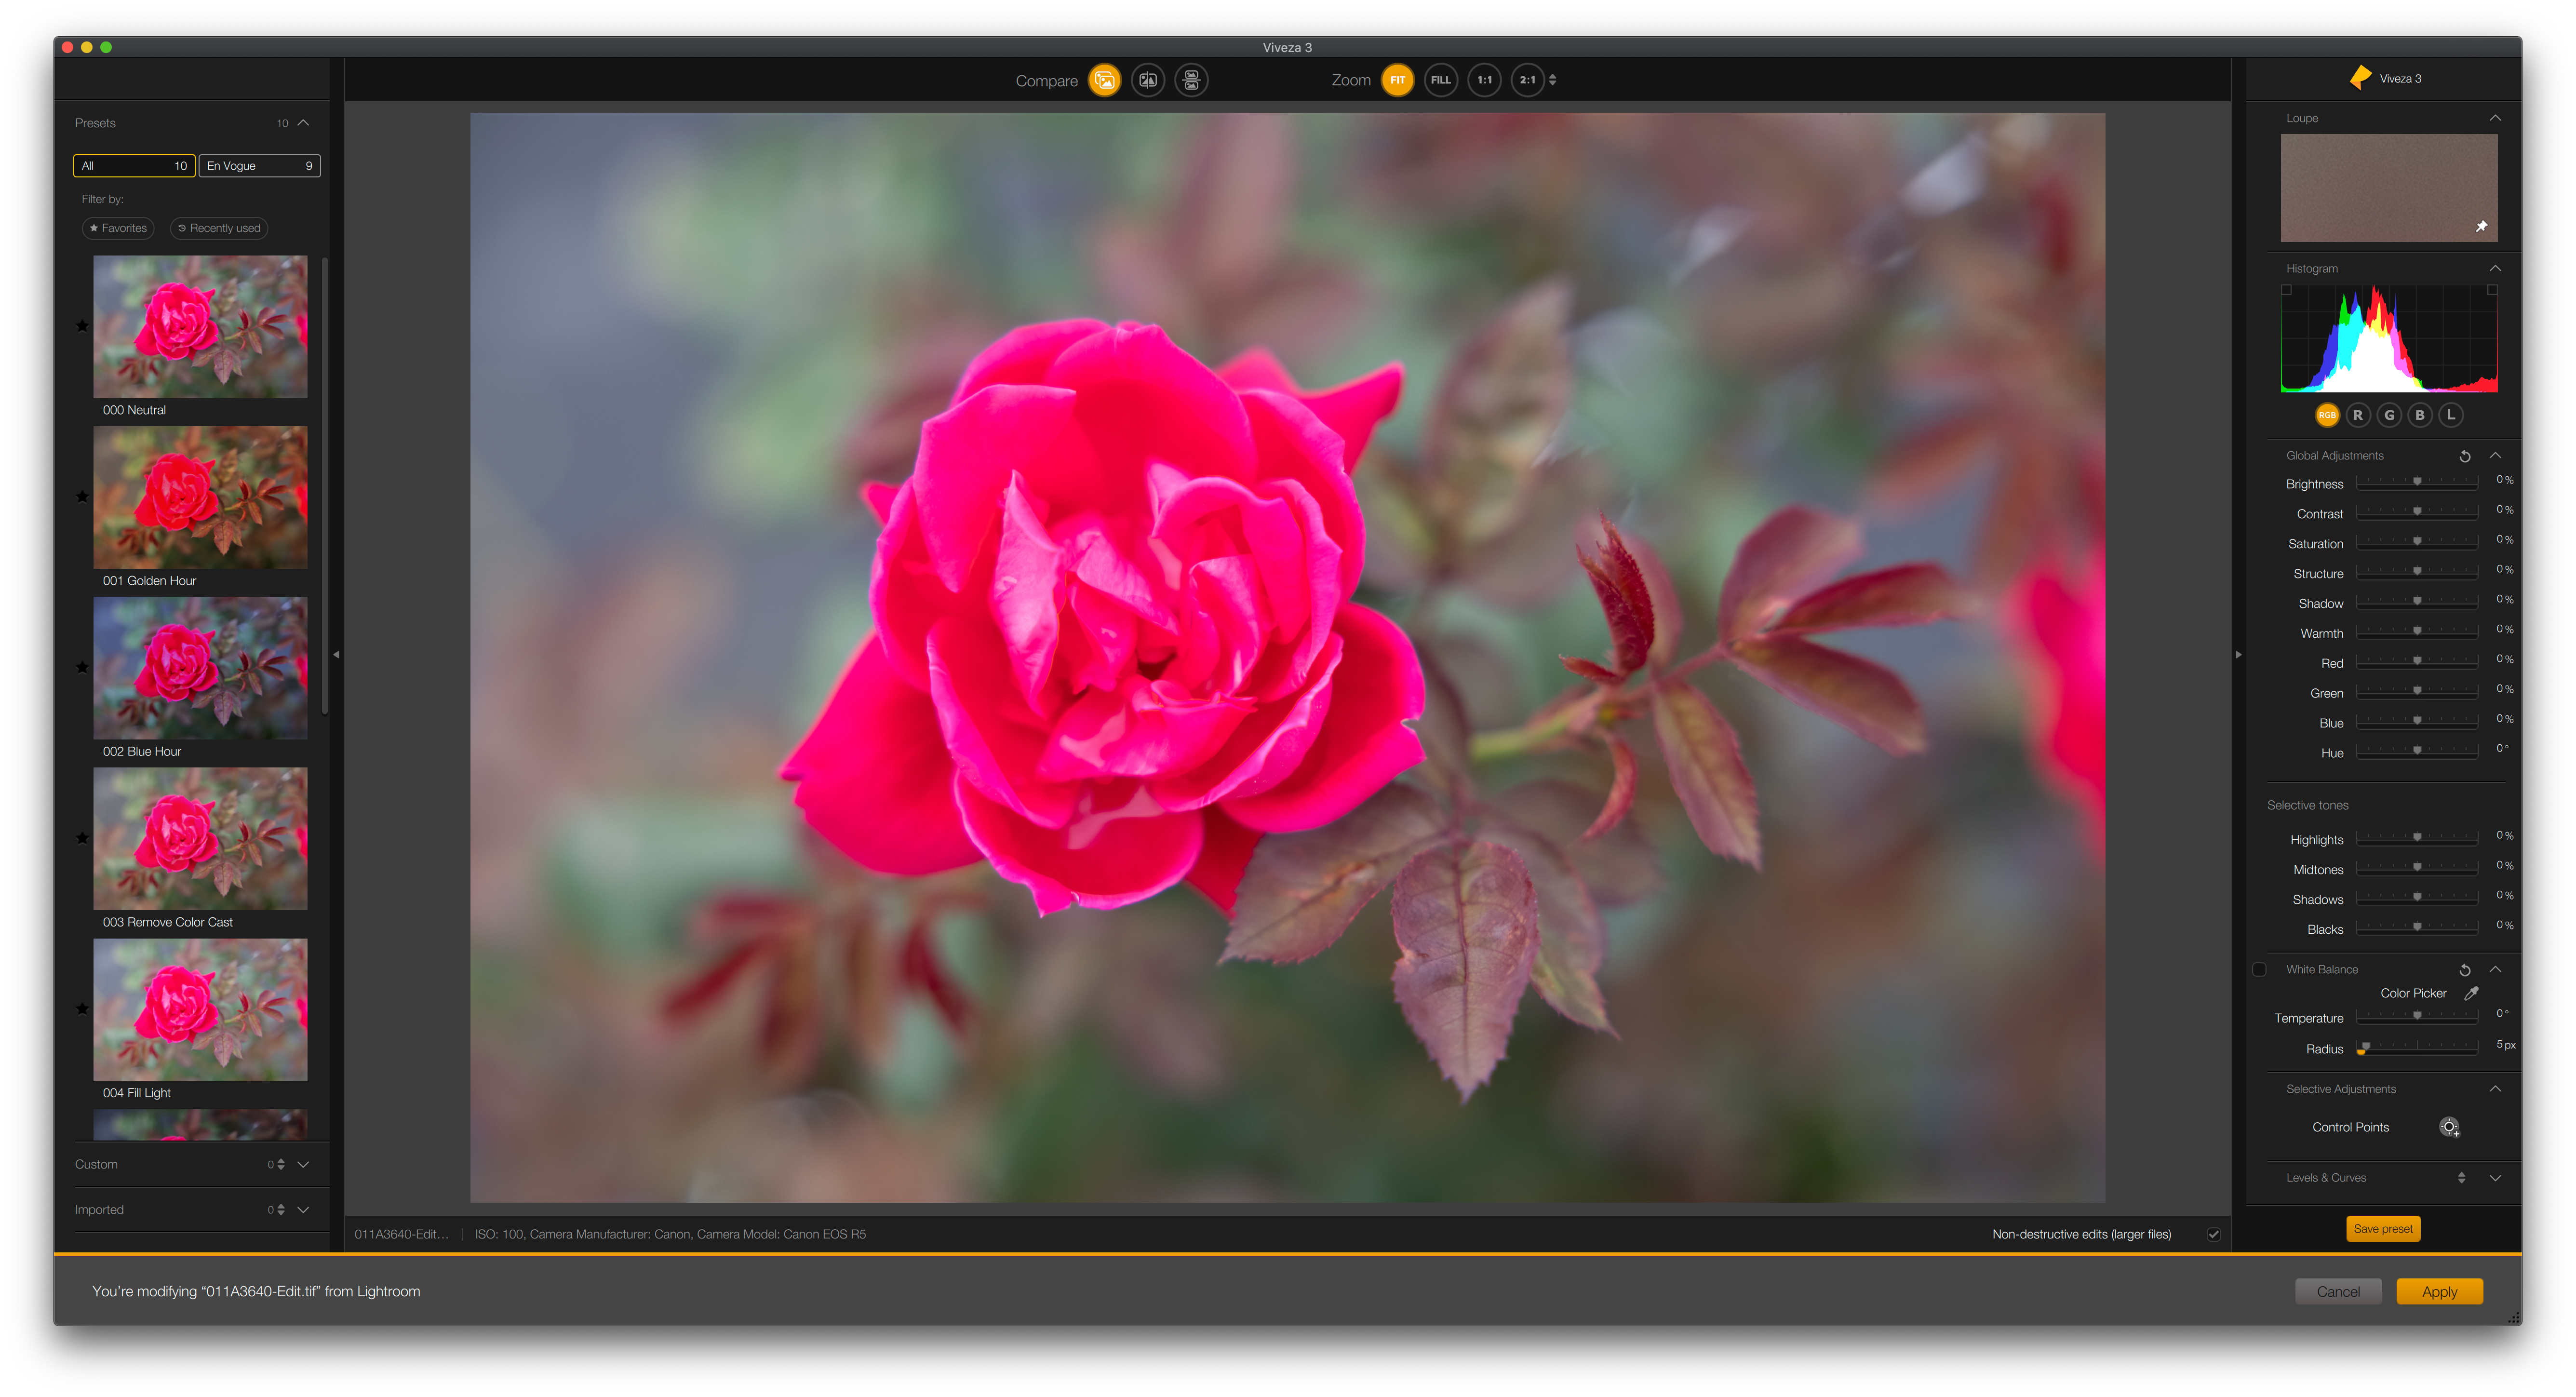
It's especially useful for editing color selectively. Photographers who capture subjects with extremely saturated color may find it difficult to accurately edit for color when working with Raw files. An image of a red rose, for example, shows too much magenta with Adobe's default colors.
Viveza makes it possible for me to quickly highlight the problem areas of the flower with a U Point mask. It's adjustable too, because of the new interface. A mix of localized and global color adjustments netted the final image below, one that shows the scene with more realistic colors.

The updated U Point system is especially useful for fine-tuning color, with more targeted results than global Lightroom color adjustments.
Other Nik Collection Tools
The Nik Collection also includes some tools for technical, rather than artistic, work. You get Dfine 3 for noise reduction and Sharpener Pro 3 for detail enhancement. These functions aren't exclusive to Nik, however. Lightroom and Capture One both have them and don't require you to render out a TIF. The technical applications aren't the reason to buy the Nik Collection, but you may still find them useful. Dfine 3 enjoys an app interface refresh for Collection 6, and Sharpener Pro will get a version 4 update to bring its interface up to par with the rest of the suite later this summer.
Nik Collection 6 Brings Minor Updates
Photographers use a multitude of tools to make images. A camera and lens are the bare necessities. But pros, artists, and serious enthusiasts take the time to capture images in Raw format and process them using all sorts of software.

A Raw processing application is the backbone of any workflow, however, and you still need one to use the Nik Collection. Many photographers are likely to reach for Adobe Lightroom or Phase One Capture One, but Nik also works with niche alternatives, including Affinity Photo and Skylum Luminar.
Even so, it's welcome to have editing options that aren't built around Raw processing. The Nik Collection bundles a good mix of artistic and technical tools, though it's the former that set it apart from the mainstream. We're happy to see it continue to receive attention and support from DxO, especially since the app lingered without updates for years under Google's ownership.
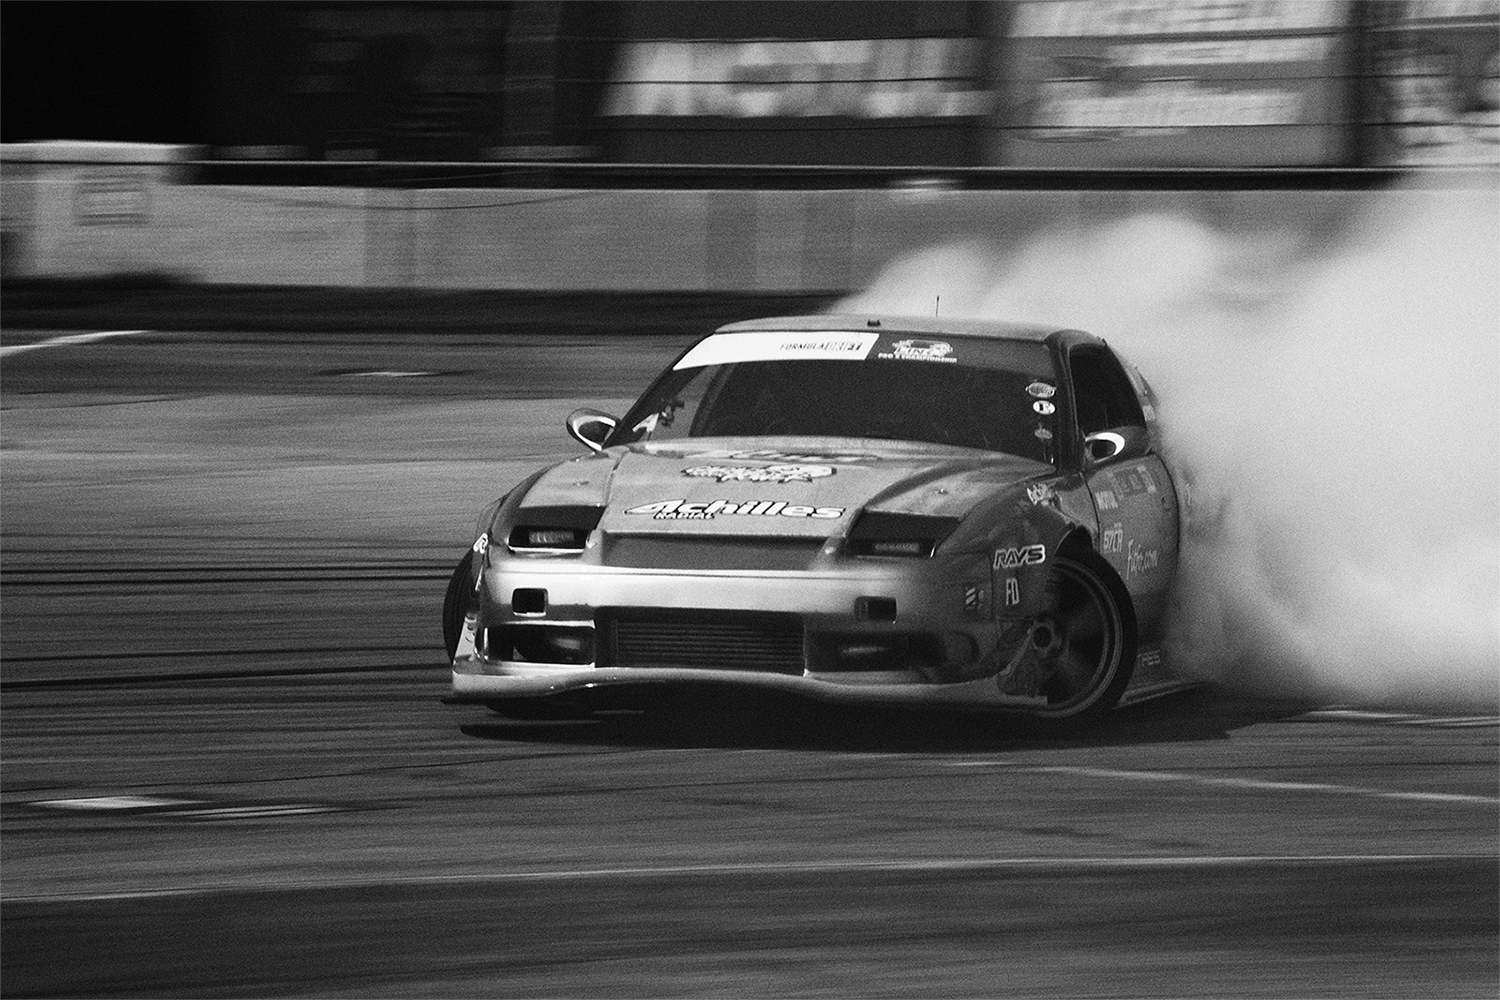
The updates to Collection 6 aren't as compelling or as extensive as what DxO provided in its Collection 4 and 5 releases, however. Apple Silicon support for all apps and U Point Control Lines across most of the suite are the highlights, along with a couple of improvements to Color and Perspective Efex. More substantive updates are coming for HDR Efex and Sharpener in the coming months, but aren't available at launch.

Therefore, this edition is a tougher sell as an upgrade. If you're happy with last year's edition and aren't using a Silicon Mac, you can safely skip Collection 6. On the other hand, if you love working with graduated digital filters, the U Point Control Line function is probably enough to justify the upgrade. Photogs who love HDR Efex will find reason to step up to the new version too, though they can safely wait until that portion ships. Upgrade pricing is available for Collection 4 owners as well, who might find two years' worth of updates more enticing.
Our advice is more enthusiastic for new customers. If you feel restricted by the editing options available in a workflow application like Lightroom and want to try a different set of tools, the Nik Collection is as attractive now as ever. It has an array of film looks, analog camera effects, and other filters you won't find in the Adobe suite. We'll call out Silver Efex Pro especially for fans of black-and-white film, as it delivers digital images that are closer to analog than you can get anywhere else. You must put in more work versus using a set of quality filters like RNI All Films 5 for Lightroom, but the results are usually worth the effort.

